


BRN SCNR Build 13.9"
BRN-180 SCNR Build: Components, Assembly, and Fit
Caleb from Brownells assembles a BRN-180 SCNR setup around a 13.9-inch upper and BRN-180 lower receiver. The video follows the build from lower receiver components through optic mounting, stock adjustments, and accessory placement.
The SCNR designation stands for Side Charging Non-Reciprocating. Caleb describes the upper’s connection to the AR-18 design and its adjustable short-stroke piston system.
BRN-180 Upper and Lower Receiver
The BRN-180 contains its recoil assembly in the upper receiver. This build therefore uses a BRN-180 lower with a rear 1913 interface and a Samson stock, rather than a conventional AR-15 receiver extension.
Caleb introduces the upper and discusses differences between the example shown and earlier versions.
Lower Receiver Components
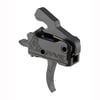
Some lower components are already installed when the video begins. Caleb adds the magazine catch, then moves to the RISE Armament RAVE 140 cassette-style trigger and anti-walk pins.
He refers viewers to Brownells’ individual component videos for more detailed coverage of these installation tasks.
Radian Selector and Die Free Co Grip
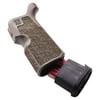
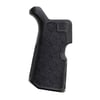
The build uses a Radian safety selector configured for a short throw. A gray Die Free Co Kung Fu Grip complements the other accessories.
Caleb also adds a grip plug, highlighting the additional grip length and enclosed storage space it provides.
Samson Stock and Initial Fit
The Samson stock attaches to the lower’s rear rail. Caleb establishes an initial mounting position before checking its relationship to the optic.
Later, with the receivers joined, he adjusts stock height and length of pull to establish a comfortable position behind the red dot.
Muzzle Device and Suppressor Selection
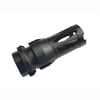
Caleb selects a Forward Controls Design birdcage-style KeyMo muzzle device to pair with a Dead Air Lazarus 6 suppressor.
The video includes muzzle device fitting and a suppressor test fit near the end of the build.
SIG SAUER ROMEO5 Red Dot
A SIG SAUER ROMEO5 provides the optic for this setup. Caleb describes it as an affordable, straightforward red dot.
He discusses seating the mount against the rail’s bearing surface and mentions witness marks as a way to monitor fastener movement.
Hand Placement and the Tiger Claw
Once the main components are together, Caleb checks where his support hand naturally rests. That position guides placement of the Die Free Co Tiger Claw.
His emphasis is on comfortable handling and configuring the accessories around the shooter.
Magpul Rail Panels
Caleb adds Magpul panels around the selected grip area. He uses only the panels needed for that placement rather than covering every available slot.
The resulting arrangement provides contact surfaces where his hand rests while leaving other portions of the handguard uncovered.
Sling Attachment and Barricade Accessory
Another Die Free Co accessory provides a sling attachment and barricade contact point.
Caleb considers access for different shooters when selecting its location and notes the receiver’s existing QD attachment options.
Completed Build
The finished setup combines the BRN-180 SCNR upper, BRN-180 lower, Samson stock, RAVE 140 trigger, Radian selector, and ROMEO5 optic with the selected grip and handguard accessories.
Caleb concludes with a suppressor test fit and final checks before inviting questions about the build.