Upgrading the S&W M&P10
BASIC M&P10 TO FULL UPGRADE BUILD
This is the follow-up to our baseline test on the Smith and Wesson M&P10 .308. In the last video, we ran the rifle in factory condition to 500 yards to see what a budget large frame AR could do with basic furniture and a mil spec trigger.
This time, we are doing the full transformation.
The M&P10 is a strong value in the AR-10 style category. It is affordable, it runs, and it gives you a solid base to build from. The goal here is simple. Improve the interface, improve the consistency, and make the rifle easier to shoot well at distance.
SAFETY FIRST: CLEAR THE RIFLE
Before any work starts, the rifle is cleared and physically verified. Magazine out. Chamber checked. Then check it again. Any build starts with safe handling and deliberate steps.
LOWER RECEIVER UPGRADES: STOCK, GRIP, TRIGGER, AND END PLATE
We begin by stripping the factory stock and separating the upper and lower. One thing that stands out on this M&P10 is how tight the takedown pins are from the factory. That is not a problem. Tight is usually a good sign. Pins will loosen slightly over time with normal use.
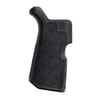
Next, the factory grip comes off. When you remove an AR grip, you are also exposing springs and detents for the selector and takedown pin. Control those parts. Pull them out and set them aside so nothing gets launched or lost.
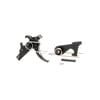
The factory trigger is removed because it was the weak link in the baseline test. It is a serviceable mil spec unit, but gritty and inconsistent. The replacement is the Brownells exclusive Geissele G2SE trigger. This is the kind of upgrade that matters immediately, especially on a rifle intended for 300 to 500 yard work.
During installation, the ambidextrous bolt catch hardware interferes with hammer installation. The fix is straightforward. Remove the ambi linkage piece by driving out the roll pin, install the trigger and hammer normally, then reinstall the ambi part and roll pin. Tricky the first time you see it, but completely manageable with basic punches.
While the lower is open, we swap the factory end plate for a Midwest Industries QD end plate. The castle nut is tightened and properly staked. If your castle nut is not staked, it can and eventually will walk loose under recoil and handling. Staking is the correct mechanical lock here, and it avoids threadlocker issues on aluminum receiver extension threads.
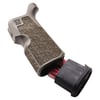
Furniture gets updated with OD green parts. The grip is the Die Free Co Kung Fu grip, and we use Action Lube Plus grease as a simple way to hold the selector spring and detent in place during installation. The optional Die Free Co grip plug adds storage and a little extra grip length.
The stock is the Magpul DT. The dual tension lock is the key feature. It adjusts smoothly, then locks solid with no movement. That is exactly what you want on a .308 rifle that you intend to shoot from positions or a bipod.
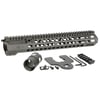
UPPER RECEIVER WORK: FREE FLOAT HANDGUARD AND GAS SYSTEM
Large frame AR tooling can be different than AR-15. A dedicated receiver block may not fit every receiver, so we switch to a Wheeler Delta Series vise block as a practical budget-friendly option.
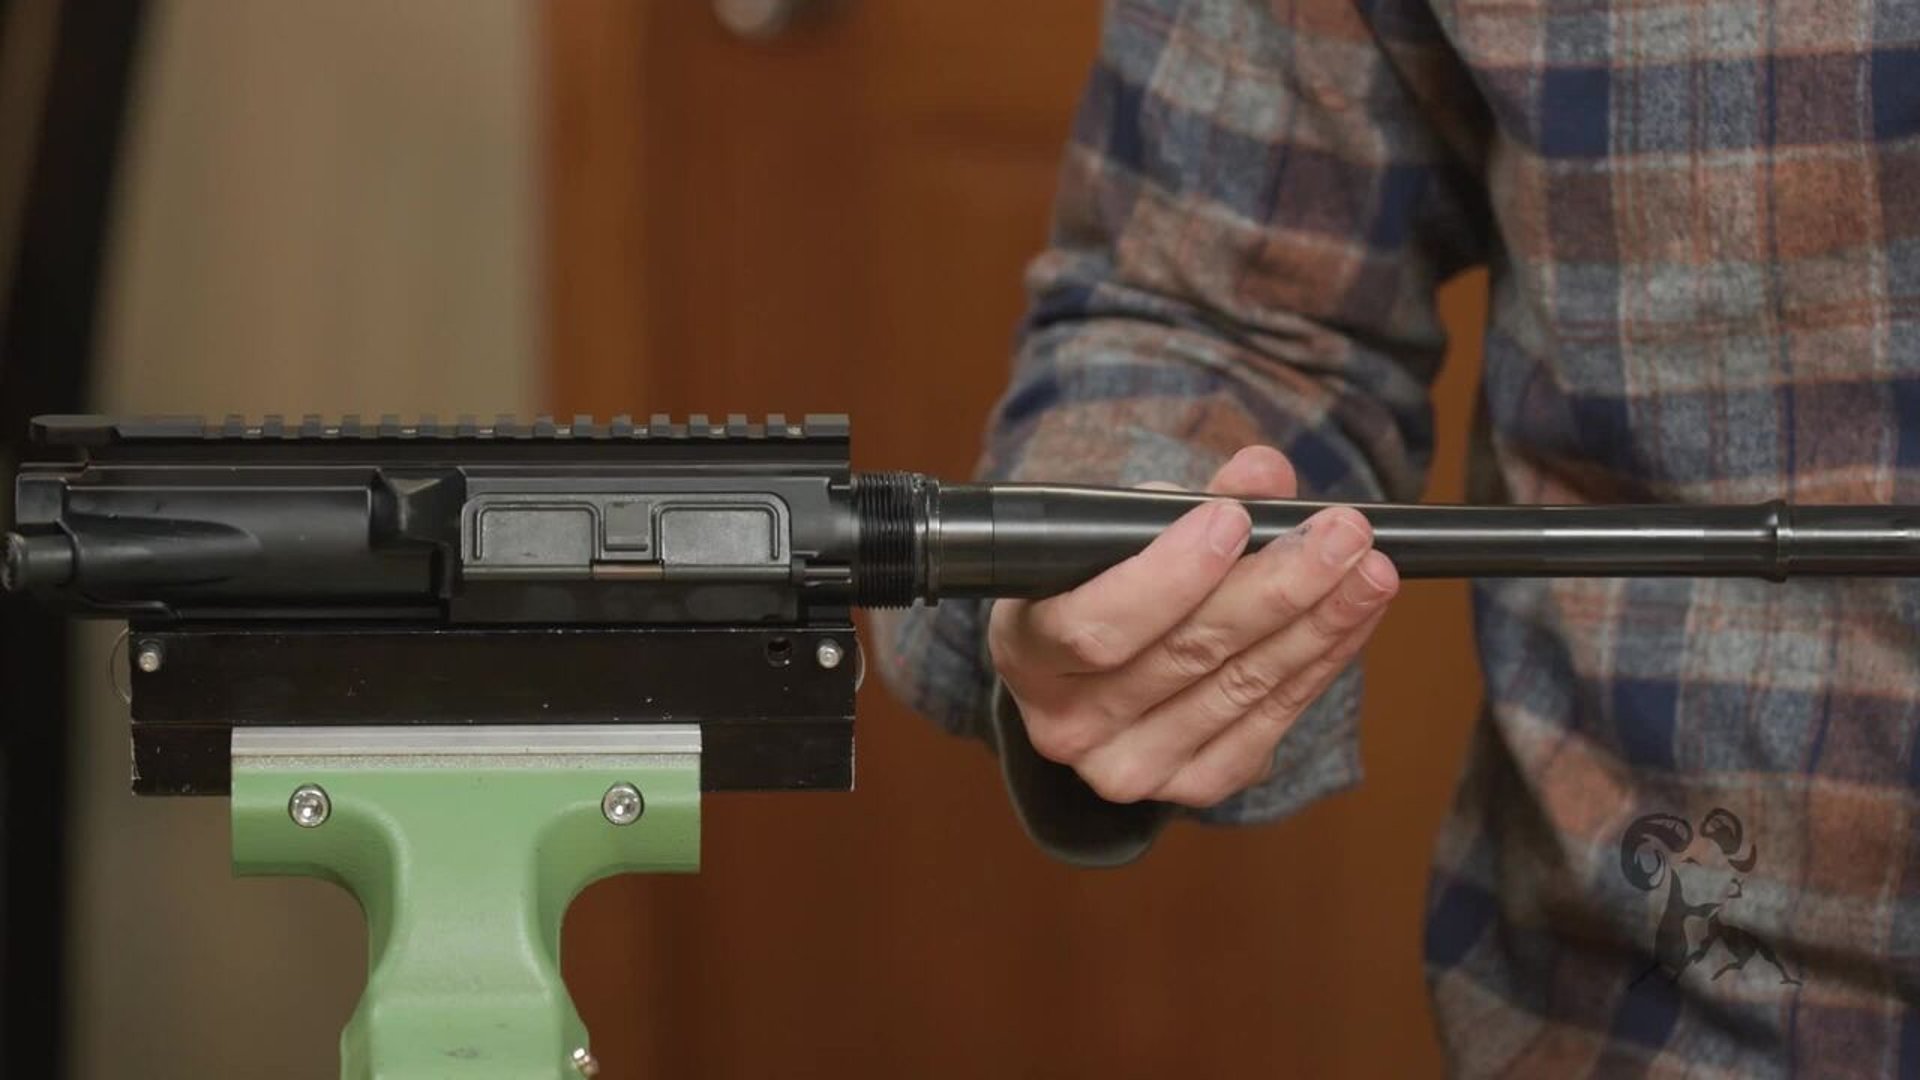
The factory handguard is removed, then the muzzle device comes off. The gas tube roll pin is driven out, the clamp-on gas block is removed, and the barrel nut is loosened. Once the barrel is out, the factory grease is cleaned off, and fresh Action Lube Plus is applied to the barrel extension and threads for a proper wet torque.
A major large frame AR note comes up here: receiver height. These rifles come in high and low top rail patterns. Smith and Wesson uses the low pattern. Aero Precision commonly uses the high pattern. Your handguard must match your receiver height or the top rail will not line up.
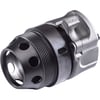
We install the Midwest Industries barrel nut and torque it to the manufacturer spec, then install a BCM steel low profile gas block and reinstall the gas tube. Steel gas blocks are the correct choice for durability and heat resistance.
The Midwest Industries free float M-LOK handguard slides on and is aligned using a quick 1913 mount as a bridging alignment tool. Once aligned, the clamp hardware is torqued to spec, and the alignment screws are snugged against the receiver.
MUZZLE DEVICE, IRON SIGHTS, AND FINAL ACCESSORIES
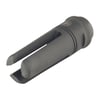
The rifle is set up to run suppressed, so the muzzle device is swapped to a SureFire three prong flash hider. Threads are degreased with acetone, timing is set with shims, then Rocksett is applied. This is the correct approach for a suppressor mount that needs heat resistance and long-term security.
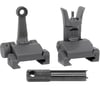
We install Midwest Industries flip-up iron sights. They are compact, lock solid, and do not take up more space than needed. A properly sized screwdriver bit matters here, and a hollow-ground driver is always the right move for slotted screws.
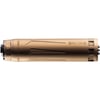
The charging handle is replaced with an ambidextrous Breek Warhammer, lubricated before installation. Then the rifle is reassembled, and the build starts to feel like a different gun.
On the handguard, we add a Die Free Co Tiger Claw hand stop, a Warne bipod, OD green M-LOK rail covers placed where hands actually contact the rifle, and we mount a suppressor. The suppressor shown is a Dead Air and Ruger collaboration RDX30 Ti with a SureFire HUB attachment.
Finally, the optic goes on. A Trijicon Credo 1-8 is mounted, and the QD mount is tightened with forward pressure to account for recoil inertia. That simple step helps keep your optic from creeping under recoil.
RANGE RESULTS: 100 TO 500 YARDS IN WIND
Back at Big Springs, we run the upgraded M&P10 from 100 yards to 500 yards. Holds are straightforward and impacts come easier than the baseline test. The rifle settles better, the trigger is cleaner, and getting on target is faster.
FINAL TAKEAWAY
The Smith and Wesson M&P10 is a budget large frame AR that can absolutely serve as a base rifle. In stock form, it can reach 500 yards with effort. With a free float handguard, a quality trigger, solid furniture, and good glass, it becomes much easier to shoot well.
If you have questions about any part of this build, post them in the comments. And if you need help selecting parts or solving a problem on your rifle, call the Brownells Tech Line. That is what it is there for.