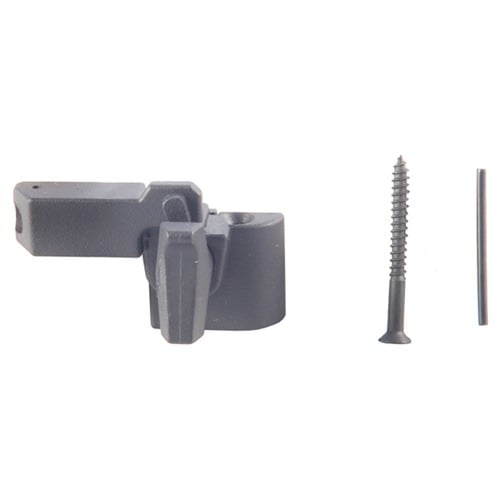
Selector
This part makes the gun look completed and ready to go to work
It's like chrome wheels for you car
I have one of them on each of my three rifles. On one rifle, I had to relieve the top portion that fits under the receiver. I filed in down and that was it. The other two fit perfectly. I guess its the difference in the stocks. I was checking my targets one day and turned around to see the Range Officer burying his face into my rifle. I asked him if he was looking for a date. He was looking at the auto switch and saw the receiver said M14. An hour later the sheriff arrived and asked to see the rifle. They look that good! It makes the rifle! Before you drill any holes, make sure it isn't touching the receiver.
Looks good In GI stock
Installed in my GI stock in about 2 min. Looks really good and thoroughly blokes the unsightly hole.
Why mess with epoxy?
The simulated selector lever dropped right in on my walnut GI M14 stock. Make sure you use the correct size drill bits for drilling into the stock for the screw and pin. I used the selector as a template and drilled the hole for the screw mount first then slightly screwed in the mounting screw into the stock to hold the selector in place. Next I drilled the pin hole into the stock to the appropriate depth and lightly tapped the pin into place with my brass faced punch hammer. Then tightened the wood screw to complete the install. The final results are a much more professional/realistic looking vs the epoxy fillers that never match the stock
I love this but....
Today, we attempted to install 3 of these, we were able to get two to fit. The third one did not fit because we were attempting to use it on a rare Devine Texas M1a. The receiver is different and some metal will need to be removed from the switch. Rule number 1, always modify the cheapest part. To begin with, no instructions come with the switch. That isn't a bad thing, first see if the switch will fit your rifle by installing it with using the screw and roll pin. If the receiver closes then you are good to go. You can save yourself all kinds of problems by drilling the hole for the roll pin larger, I think that the pin is too big as it comes from the factory. You are going to have to use a drill no matter what! You need to pre-drill the holes for the roll pin and screw in the wood. Install the roll pin first, remount your receiver and position the switch and check for clearance. I would not attempt to install without using a drill.
Not a perfect fit
I had to grind quite a bit of metal off the leading edge to get this to fit the cutout on my GI stock, and also slightly relieve the wood around the handle bolster. The roll pin used to connect the handle to the body of the switch didn't go all the way through the assembly. Once put in place it looked good, and filled the cutout well.