easy to do
very easy to do if you can follow the instructions exactly
Cerakote is great.
Cerakote is great for protecting a firearm. It looks great when finished. It prevents rust and wear. Two parts with Cerakote applied to both seem to not wear off the coating. Add some oil to the parts and everything moves so smoothly past each other. On the down side it requires investment in equipment to apply it. The process is not difficult but requires some time and effort.
looks great
this burnt bronze cerakote was easy to apply if you follow instructions. looks great. if your willing to take time for prep you will be very satisfied with results
great product
This is a great product but not for the amateur I was doing guns with an airbrush but to much over spray you need a low pressure low volume gun about between $300 and $500 to do professional work the prep is very important a 100 grit alum oxide blast and you do need a professional paint booth I use to buy my paints from Brownells but their price went up now Nics Industries is cheaper
Cerakote oven coatings
I needed to refinish an older 1911 that was getting worn. I bought the Cerakote oven cure, followed the instructions for prepping the parts. Then I applied the coating with an air brush, racked the parts, and baked as instructed. It turned out great! Color was nice and even, It did tighten up the slide somewhat, to where I had to lube and work it some, to function properly. So be aware of tight fits on your firearms. Overall, I like it!!!
Great Product!
Wow really like this product. I have been applying spray on bake finishes to firearms and knives for 10 years (mostly K&G Gun Kote). I have obtained very good results using an inexpensive setup consisting of a spray gun (not an airbrush) and air water separator that I purchased for about $35 total. I have found that no matter what coating you use the prep is the most important step. The prep for Cerakote and the application takes a bit longer than other coating because you really need to get the spray (air pressure and liquid amount) dialed in before you start your parts. I found that over all Cerakote was less forgiving and is a bit harder to use than other coatings I have used in the past. Having said that Cerakote is definitely going to be my new go to finish for firearms and knives. While I do think the K&G Gun Kote is a very good product and is probably better if you are going to do a camo project, Cerakote definitely gives you better lubricity and is a more durable finish.
Best Firearm Finish Hands Down... Period
As long as you follow the directions - you cant go wrong - applicant must have a slight background/experience in painting (Painting 101) - Step 1 - Prep (Abraise *Scotch Brite scrub does work* - Cant sand-blast optics and certain polymers, Degrease, Degrease, Degrease - Warm the parts to be coated. Step 2 apply throught HVLP Gun, Prevail Sprayer or Air-Brush it all works just DO NOT stop while making your pass or *in mid-stroke* you WILL create a puddle that will run this stuff is thinner than water - Step 3 Keep it hangin' until you get it to your curing oven or let it hang dry for a week if its the ambient cure - thats it! - whatever route you take to achieve these steps is on you - its ok to improvise - I do no have a blasting cabinet - it just takes me a little longer for prep - You can easily prep Anodized surfaces, parkerized surfaces, blued surfaces, polymers, bare metals etc *Substrates which do not have old paint on them or have been previously painted* - Then your talking a different story the paint MUST be blasted off or the CeraKote will stick to the previous coating of paint (which may not be the best - given the whole plan is to slap on a new state-of-the-art finish to begin with - ya know?) Anyway this stuff rocks and if you keep in mind the important steps when painting anything - PREP WORK IS EVERYTHING!!! Degrease, Degrease, Degrease with Acetone..... You'll be fine!
Tough stuff!
This isn't my first time using a 'wonder finish'. I've used Duracoat and GunKote products extensively over the past few years, and prep work is what makes for a good finish. I bought the Sniper Gray Cerakote H product to finish a knife that I made from an old leaf spring. I sand blasted the knife with 120 grit, heated and cleaned with acetone to get any traces of oil out of the pores. Per the instructions, I mixed my Cerakote at a 16:1 ratio for a shinier finish, applied with a cheap Harbor Freight airbrush and baked in a toaster oven (250 degrees for 2 hrs. The finish is EXACTLY the same shade as Chris Reeve used on his MK IV series and is incredibly tough. I batoned the blade through several pieces of oak, and there isn't a single scratch on the finish. I don't believe that Duracoat or Gunkote would have held up to this level of abuse. While Cerakote is a little more difficult to use (due to the mixing and requiring an airbrush), I will be using it exclusively in the future. I am VERY pleased with the results.
Best stuff ever
My first attempt was not successful at all I used a co2 sprayer. The sprayer did not have a good steady flow of air and caused the coating to spot. I then found a HVLP 0.8mm tip sprayer from a US company that cost less then $30. My second attempt using this sprayer with an air pressure between 22 and 25 PSI. The slide came out perfect. Make sure you use a really good cleaning agent like Brownells TCE. Also remember when you spray to start with the hard to reach areas first.
provides a very nice finish
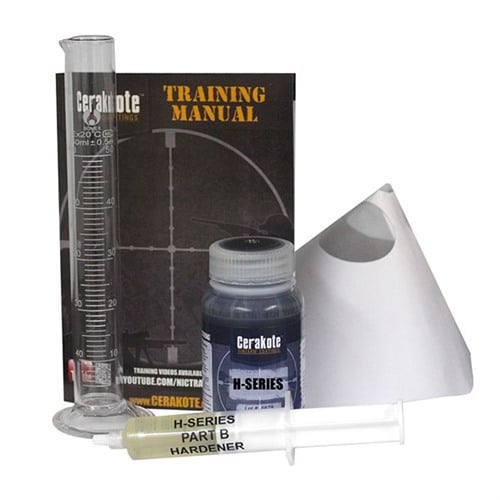
First I will walk through what I did. Keep in mind I am doing this low budget to start and see if I like it. For heating the coated items, I used a Toaster oven from the Thrift store. I didn't trust the temp controller on the toaster oven, so I used an external temp controller and solid state relay purchased from [...]. This worked very well. I am starting with handguns so a large toaster oven is about the correct size.I sprayed the Cerakote with a Paasche H series air brush with the middle sized tip with about 35 psi air. I held the airbrush about 12 inches from the item being painted. This also works well. It sprays well and covers well and is very easy to get a good even nice coating.For cleaning the item, it is very important to degrease very well. This kit comes with instructions that specifically say to use the Brownells TCE degreaser. This degreaser is a bit pricy for my taste, so I contacted NIC industries and asked about Acetone and they say Acetone works well. I also heat the item to 275-300F. This pushes out the oils from the pores and cracks in the metal or between metal parts. It is above the curing temp of 250F so no additional oils should be pushed out when curing.This kit comes with a large graduated cylinder. For the small parts I am working on, that large of quantities is too much for accurate measurement of small quantities. I ended up purchasing some smaller graduated cylinders. My complete process is Degrease very well by soaking in Acetone.Blast with 120 gritHeat to 275 300FWash with clean AcetoneSpray Cure at 250FSo in short, this product provides a very nice looking finish and is easy to apply as long as you have a the proper equipment.