True North Modular Holster Adapter
In this quick tip video, Caleb from Brownells demonstrates the True North Concepts Modular Holster Adapter. He unboxes, assembles, and explains the color-coded hardware system, showing step-by-step how to attach it to a gun belt and pair it with a SafariLand QLS setup and leg strap.
What You Will Learn
Viewers will learn how to assemble and mount the Modular Holster Adapter, how to integrate a QLS system, adjust holster position, and fine-tune setup for comfort and stability.
Benefit
Watching helps shooters build confidence in setting up their holster for smoother, safer draws and better performance on the range.
Introduction
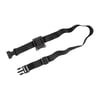
Caleb from Brownells kicks off this quick tip by introducing the True North Concepts Modular Holster Adapter, a favorite component in his personal gear for securing holsters to a gun belt. He highlights the importance of stability, especially when carrying heavier firearms, and explains why he pairs the adapter with a leg strap to keep the holster from flapping during movement.
Overview of the Modular Holster Adapter
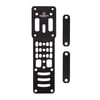
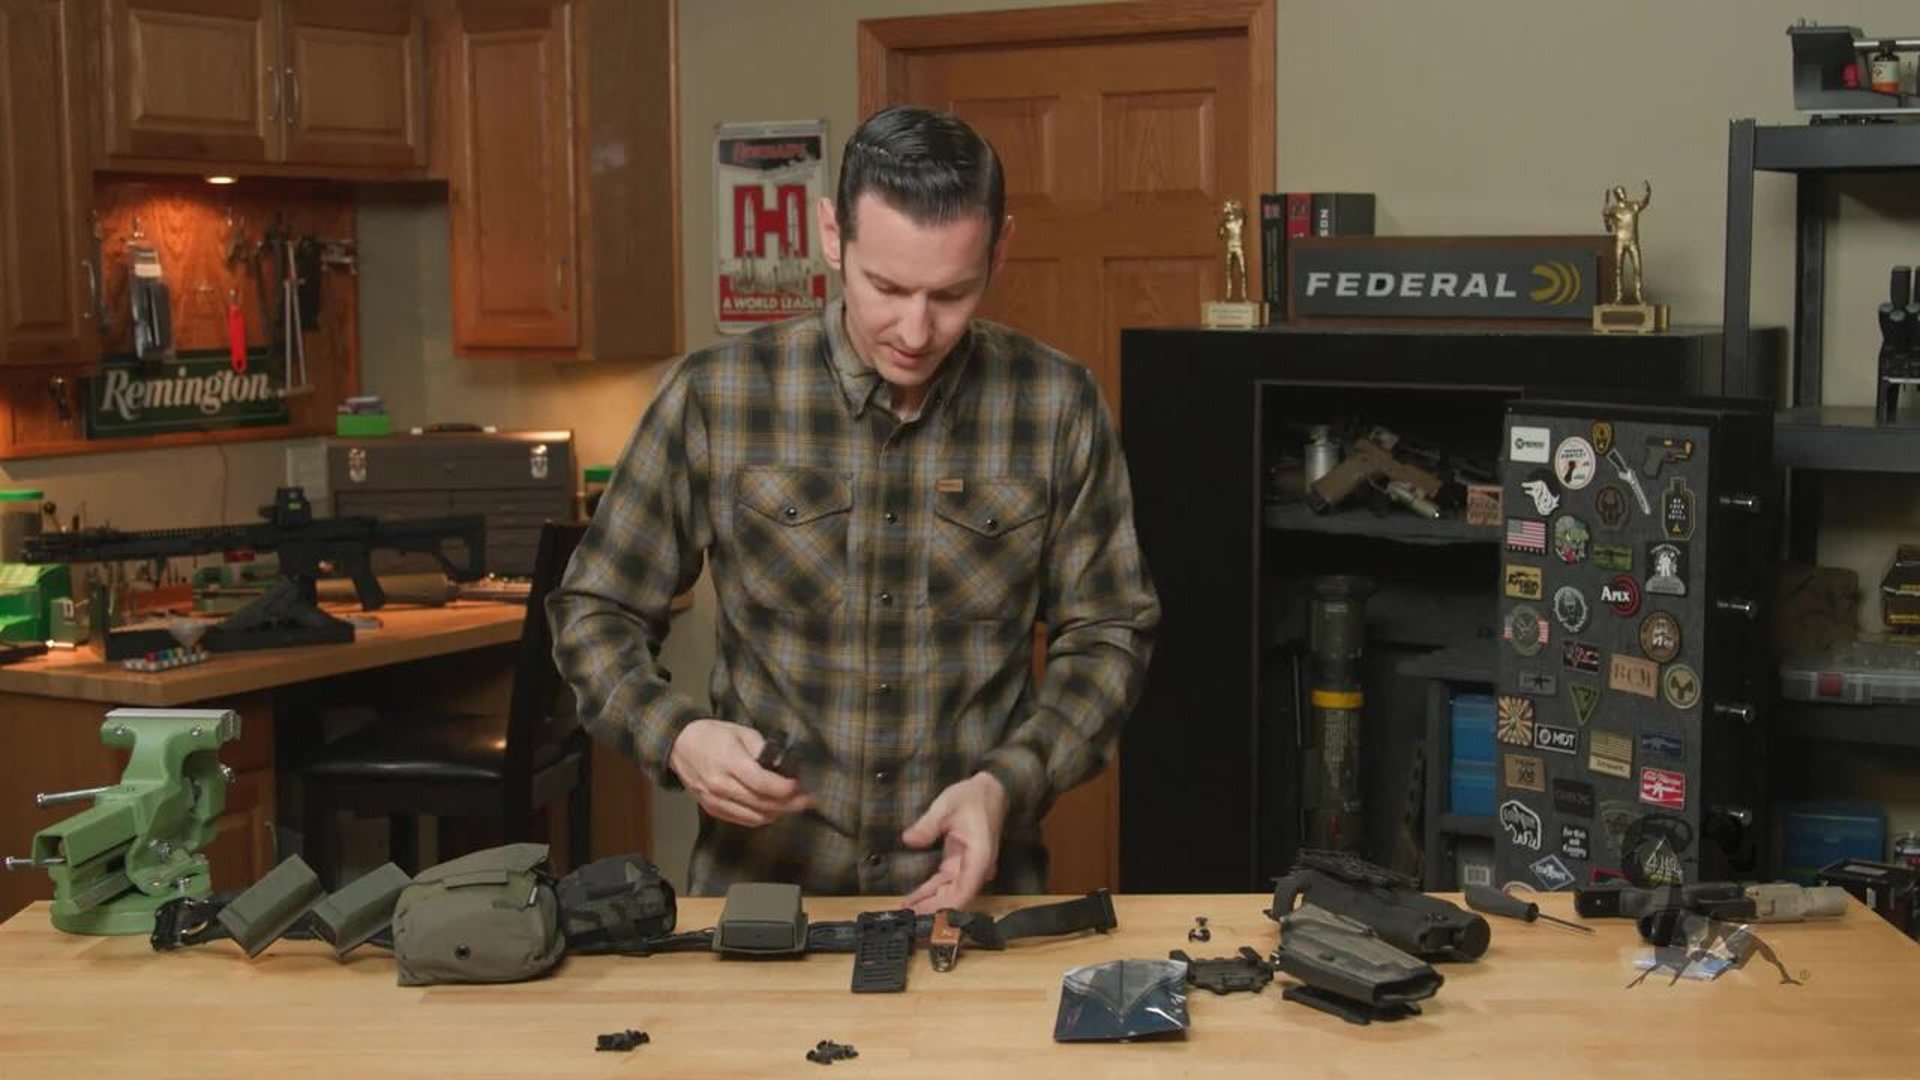
The adapter is made from billet aluminum, giving it superior strength and durability. Caleb walks through the package contents, which include mounting plates, a detailed hardware kit, and color-coded bags that correspond to different installation steps. While it's been a while since he last set one up, he goes through the process step by step as if for the first time, making it easy to follow.
Unboxing and Hardware Breakdown
Caleb opens the packaging and unpacks various components, including three sets of hardware in color-coded bags: red for belt mounting, green for holster mounting, and blue for direct-to-holster applications, which he won’t use in this demo. He explains each piece, including rubber spacers, screws, and anti-vibration compound (Vibra-Tite), offering practical advice on when and where to apply it.
Understanding Color-Coded Hardware Packs
Each hardware bag serves a specific purpose. Caleb explains that the red bag is used for attaching the holster adapter to the gun belt, while the green bag is used to mount the holster or QLS adapter to the plate. The blue bag is not needed for this setup, as it's intended for direct-to-holster mounting.
SafariLand QLS Mounting Explanation
Caleb demonstrates his use of the SafariLand QLS (Quick Locking System), which allows him to swap between different holsters—such as for a Sig 226 or Glock—without having to reconfigure his belt. He explains the convenience of this quick-change system and its benefits during training or range work.
Attaching Adapter to Gun Belt
Next, Caleb shows how to mount the adapter plate to the gun belt using the provided spacers and screws. He uses a Pharaoh Concepts Bison belt for the example and explains how to position the adapter securely while allowing for minor forward and backward adjustments. He prefers this flexibility as it allows for subtle positioning tweaks when putting on the belt.
Adjusting Position and Tightening Screws
Once the adapter is loosely mounted, Caleb adjusts the positioning to his liking before tightening down the screws. He recommends either leaving out the rubber spacers for easier sliding or using Vibra-Tite for a locked-in fit, depending on personal preference. He uses a multi-tool to finish tightening, noting the importance of securing the screws without overdoing it.
Mounting QLS Adapter to Plate
Caleb attaches the SafariLand QLS fork to the adapter plate using the green hardware pack. He prefers a vertical mount, as it aligns better with his draw stroke. He carefully places the rubber spacers and screws, again applying a small amount of Vibra-Tite to ensure a solid, reliable hold.
Installing the Leg Strap
To complete the setup, Caleb adds the optional leg strap. He mounts it on the rear slot of the adapter, pushing the holster slightly farther from his leg for comfort. Using the remaining screws and spacers, he tightens the leg strap securely and highlights its adjustable sizing—suitable for a wide range of users.
How to Check and Customize Holster Height
Caleb explains how to determine the optimal holster height and cant. He recommends wearing the belt and holster setup as you would during actual use, inserting a firearm, and practicing your draw. The key is to achieve a natural and smooth motion. Adjustments may be necessary depending on torso length, arm reach, and personal draw preference.
Final Thoughts and Training Tips
The best way to finalize your holster configuration is to take it to the range. Train with the setup, evaluate your draw, and make any needed adjustments. Caleb encourages shooters to experiment and find what works best for them rather than copying someone else's exact configuration.