Product Spotlight : Lightweight SOLUS Build
INTRODUCTION TO A LIGHTWEIGHT PRECISION BOLT GUN BUILD
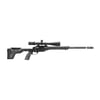
In this Brownells Tech Tip, Caleb walks through a complete lightweight precision bolt gun build centered on the Aero Precision Solus LT action. The goal is simple: keep the rifle light, keep it accurate, and use proven parts that make sense for a practical field and range rifle. This build combines a lightweight action, carbon fiber chassis, quality pre-fit barrel, dependable trigger, and a lightweight optic package to create a well-balanced 6.5 Creedmoor precision rifle.
Right from the start, Caleb explains that some parts on this build came from previous projects, so they show a little honest wear. That does not change the process. What matters here is how the parts fit together and how to assemble them correctly.
MDT HNT26 CHASSIS FEATURES
The chassis for this rifle is the MDT HNT26, including the side-folding configuration. Caleb points out a few standout features right away. The chassis is lightweight, compact, and available in different colors and configurations, including versions with or without an integral ARCA rail. For shooters already running ARCA-compatible bipods and tripods, that built-in rail is an easy choice.
The folding design also makes the rifle easier to transport in a case without sacrificing the rigidity needed for a precision bolt action setup. For a lightweight long range rifle or hunting rifle, that blend of portability and structure is a strong advantage.
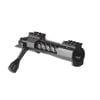
AERO PRECISION SOLUS LT ACTION OVERVIEW
The foundation of the build is the Aero Precision Solus LT action. Caleb compares it directly to the standard Solus action and shows where the weight savings come from. The LT version removes unnecessary material from the top rail and receiver body while maintaining the same overall function and footprint.
The bolt is also different. Instead of a solid body, the Solus LT bolt is fluted to reduce weight while keeping strength and structure. Caleb notes that the bolt handles are different as well, but they are interchangeable. For anyone building a lightweight precision rifle, those small reductions in action and bolt weight add up quickly.
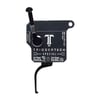
TRIGGER SELECTION AND INSTALLATION
For this build, Caleb chooses between a TriggerTech Diamond and a TriggerTech Special. While the Diamond offers an extremely light pull range, the TriggerTech Special makes more sense for the intended use of this rifle. Since the build is not meant to run below one pound, the Special is the better fit.
He starts installation by identifying the trigger mounting hardware that comes with the action. The trigger bracket, pins, and screw all work together to secure the trigger assembly into the Solus action. Caleb walks through how the bracket wraps around the trigger housing, how the pins are inserted, and how the assembly cams into place inside the action.
Once positioned correctly, the bracket sits flush and the retaining screw is installed with a small amount of blue Loctite. This is a simple step, but proper alignment matters. If the bracket is not seated correctly, the trigger will not sit flush in the receiver.
BARREL INSTALLATION AND TORQUE
The barrel used in this rifle is a Proof Research pre-fit barrel in 6.5 Creedmoor. Caleb notes that it was originally set up for a Zermatt Origin pattern, which matches the Aero Precision Solus footprint. That allows the barrel to thread directly onto the action without extra machine work.
To install it, he secures the barrel in a barrel vise using the correct size bushings. He then applies a small amount of Brownells Action Lube Plus to the threads before spinning the action on by hand. Once hand-tight, he uses the Aero Precision Solus action wrench and a torque wrench to bring the barrel up to the proper spec.
Aero Precision recommends about 75 to 80 foot-pounds for the barrel installation, and Caleb chooses the low end of that range at 75 foot-pounds. That gives the barrel a secure, repeatable fit without overdoing it.
HEADSPACE CHECKING ON THE 6.5 CREEDMOOR BUILD
After the barrel is installed, the next critical step is checking headspace. Caleb uses go and no-go gauges for 6.5 Creedmoor to confirm the chamber is correct. He also addresses a common misconception, explaining that you do not need to remove the extractor and ejector just to check headspace on this setup.
The go gauge should allow the bolt to close fully. The no-go gauge should not. In this build, the bolt closes on the go gauge and stops well short on the no-go gauge, confirming proper headspace. This is one of the most important checks in any custom bolt action rifle build, and it should never be skipped.
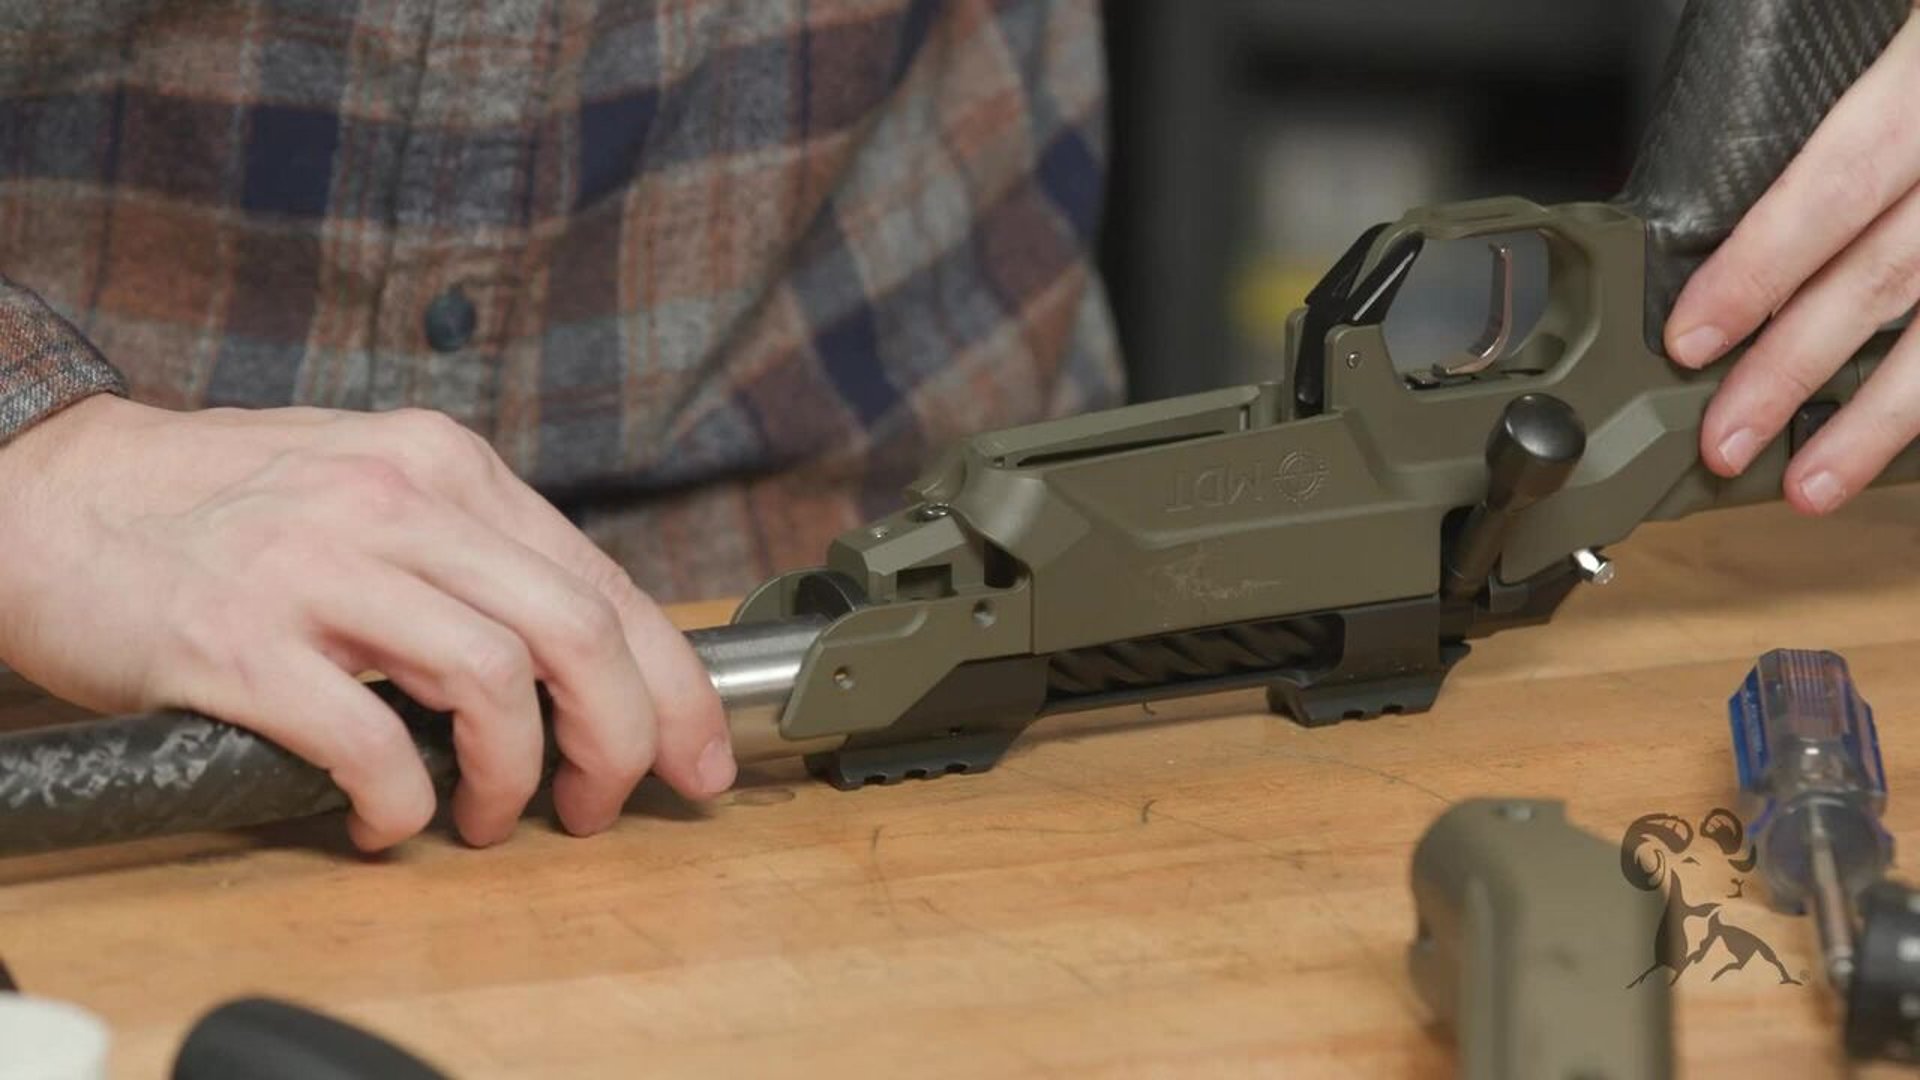
FITTING THE ACTION INTO THE MDT HNT26 CHASSIS
With the barreled action complete, Caleb moves to the MDT HNT26 chassis. He removes the handguard first to make the action installation easier and then drops the barreled action into place. He points out that a small amount of front-to-back play is normal before the screws are torqued.
The chassis uses a short front action screw and a long rear screw. Before tightening them, Caleb makes sure the recoil lug on the action is fully seated against the corresponding lug surface in the chassis. This is a critical detail for consistency. If those surfaces are not firmly mated, the action can shift under recoil.
MDT recommends 60 to 65 inch-pounds for the action screws, and Caleb sets them to 60 inch-pounds. He torques the front screw first, then the rear, while keeping the recoil lug fully seated. That gives the action a solid foundation in the chassis.
HANDGUARD AND MUZZLE BRAKE INSTALLATION
Once the action is torqued in place, the handguard is reinstalled and the screws are snugged down. Caleb notes that the chassis body is aluminum while the handguard itself is carbon fiber, which helps keep weight down without giving up useful forend length.
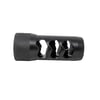
For the muzzle device, he installs an Area 419 muzzle brake. The first section threads onto the barrel, and the outer locking portion uses reverse threads to secure and time the brake. Caleb keeps the process straightforward, aligning the brake vertically and tightening the locking collar against the bevel for a secure fit.
For a lightweight 6.5 Creedmoor precision rifle, a brake like this can help reduce recoil and make spotting impacts easier, especially when shooting prone or from a bipod.
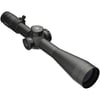
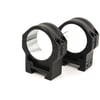
LEUPOLD MARK 5HD OPTIC AND AREA 419 HUNT RINGS
The optic for this build is a Leupold Mark 5HD with the PR2 mil reticle. Caleb immediately notices how light the scope feels, which makes it a strong match for a lightweight precision rifle. He also points out that the reticle is exactly the kind of layout he likes for a mil-based rifle setup.
To mount the scope, he uses Area 419 Hunt rings. These rings are designed to be lightweight while still maintaining precise alignment. Caleb highlights one of their key features: the rings are machined to extremely tight tolerances, which means there is no need for lapping when everything else is true.
He also shows the steel alignment posts that help keep the ring caps centered as they tighten down. The base screws are torqued to 45 inch-pounds, and the ring cap screws are torqued to 18 inch-pounds according to the manufacturer’s instructions
LEVELING THE RIFLE AND SCOPE PROPERLY
Scope leveling is another place where Caleb slows down and explains his method. Since the rail is split in a way that prevents his usual leveling tool from working directly, he levels the rifle first using a bubble level on the action rail. From there, he sets eye relief and uses a square reference to level the optic body.
One of the more useful tips in this section is his warning against leveling from the top turret. The turret assembly may not be perfectly centered because of internal springs and components, so it is better to level from the bottom surface of the scope body whenever possible. That is a practical detail that can save a lot of frustration when mounting a precision rifle scope.
FINAL FUNCTION CHECK AND ACCESSORIES
After the optic is mounted, Caleb performs a trigger function check. He tests the trigger on fire, confirms the safety works properly, and does a basic bump test to make sure the trigger remains secure under light impact. This kind of final check is simple, but it is a good habit on any rifle build.
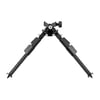
He then adds an MDT metal magazine and an MDT CKYE-POD Gen 2 Lightweight bipod. Caleb is especially interested in the bipod because it offers an impressive balance of low weight and solid stability. Since he is a left-handed shooter, he also flips the ARCA mount orientation so the adjustment knob sits on the right side where it is easier for him to reach while shooting.
That setup gives the rifle a more practical interface in the field or on a barricade, and it rounds out the build with a support system that matches the lightweight precision theme.
FINAL RIFLE BUILD RECAP
By the end of the video, the rifle is fully assembled and ready for the range. The finished setup includes the Aero Precision Solus LT action, MDT HNT26 chassis, Proof Research 6.5 Creedmoor pre-fit barrel, TriggerTech Special trigger, Leupold Mark 5HD scope, Area 419 Hunt rings, Area 419 muzzle brake, and MDT CKYE-POD Gen 2 Lightweight bipod.
This is a strong example of how to build a lightweight precision bolt gun without giving up the key features that matter for accuracy and usability. Every part in the build supports the same goal: reduce unnecessary weight while keeping the rifle stable, repeatable, and comfortable to run.
For shooters planning a custom bolt action rifle in 6.5 Creedmoor, this walkthrough covers the important steps, the torque values that matter, and the little setup details that can make a rifle perform better from day one.