Tech Tip: Upgrading the Ruger Mk IV
Introduction
Caleb from Brownells walks you through a complete upgrade of the Ruger Mark IV, featuring performance parts from Volquartsen. If you’re looking to take your .22 LR pistol to the next level, this in-depth guide covers disassembly, installation, and fine-tuning from start to finish.
Overview of the Ruger Mark IV
The Ruger Mark IV is the latest evolution of a platform that has existed since the Mark I. One of the most notable improvements over previous versions is the simplified takedown system. The parts shown in this video are designed specifically for the Mark IV and the 22/45 variant.
What Comes in the Volquartsen Kit
Included in the Volquartsen Accurizing Kit are all-new fire control group components: a pre-travel and overtravel adjustable trigger, a new sear, hammer, and an extended slide stop. The kit also eliminates the magazine safety, a feature many shooters find cumbersome.
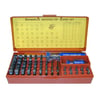
Tools You’ll Need
Tools required include punches, needle-nose pliers or hemostats, a set of Allen keys, a magnet-tip screwdriver, and optionally, a gunsmith vise with hard plastic jaws. Loctite is included with the kit for securing the adjustment screws.
Safety Check and Disassembly
Before beginning, Caleb ensures the firearm is completely unloaded. He walks through the unique takedown process of the Mark IV, which involves activating the safety before releasing the rear cam latch.
Removing the Grips and Internals
The grip panels are removed to access internal components. Caleb explains the importance of being cautious with the spring-loaded magazine assist lever under the grip. Once disassembled, the internal components including the hammer and safety can be removed.
Removing the Safety and Hammer Assembly
With the safety lever removed, the hammer assembly and magazine safety come out as a single unit. Caleb details how the sear pin is only held in by spring tension and the grip panel, making it easy to remove.
Removing Trigger and Slide Catch
Caleb carefully explains the removal of the factory trigger and slide catch. He highlights the small retaining spring under the trigger pin and demonstrates a safe method to release it using punches and a vise.
Installing the New Trigger Assembly
The Volquartsen trigger and trigger bar are installed as a unit. Caleb emphasizes proper orientation and alignment, walking through the trigger pin installation and reassembly of the trigger-related parts.
Reassembling with New Components
The slide catch, bar, and all related hardware are reinstalled. Caleb ensures proper spring tension and confirms all parts are aligned correctly before moving on.
Installing Sear and Hammer
Using careful placement and tools like a punch and pliers, the new Volquartsen sear and sear spring are installed. Caleb walks through proper spring orientation and how to preload the spring for correct function.
Reassembling Safety and Testing Fit
Once the sear and hammer are in place, Caleb installs the ambidextrous safety lever. He demonstrates how to test for correct safety operation and verifies that the hammer and trigger mechanisms are functioning as intended.
Reinstalling Grips and Safety Lever
With the fire control group fully installed, the grip panels and safety lever are reinstalled. Caleb shares tips for screw placement and cautions against overtightening.
Final Assembly and Trigger Function Check
The upper assembly is reattached, and the pistol is cocked for function testing. Caleb confirms correct operation of the safety and hammer. All parts have been properly reinstalled without any extras left over.
Adjusting Pre-Travel and Overtravel
Using a ball-end hex wrench, Caleb demonstrates how to adjust both pre-travel and overtravel using the screws provided in the Volquartsen kit. He explains the importance of leaving a small amount of slack to prevent unintended doubling under recoil.
Final Trigger Feel and Wrap-up
After tuning, Caleb performs several dry fires and confirms a drastically improved trigger feel. The reduced pre-travel and minimal overtravel result in a crisp, responsive trigger—ideal for competition or precision target shooting.
This simple upgrade turns a standard Ruger Mark IV into a truly capable target pistol. If you’re looking to enhance your .22 LR shooting experience, this kit delivers real performance improvements.