Tech Tip: Midwest Industries Beretta 1301 Stock Install
In this Tech Tip, I’m walking through the full installation process of the Midwest Industries stock for the Beretta 1301 Tactical. This setup provides a modular buffer tube-style interface, giving you flexibility with grips, stocks, and accessories. Whether you're replacing a factory stock or starting a fresh build, I’ll guide you through each part of the install.
What You will Learn
In this Tech Tip video, you'll learn how to fully install the Midwest Industries Enhanced M4-style stock adapter on a Beretta 1301 Tactical shotgun. Viewers will gain step-by-step guidance on removing an existing stock, prepping the receiver, and correctly installing each component—including torque specs, threadlocker use, and accessory setup.
Benefit
Watching this video will help you confidently upgrade your 1301 for improved modularity, comfort, and performance, especially if you're looking to customize it with AR-style grips, adjustable stocks, and M-LOK accessories.
Intro and stock overview
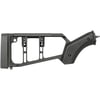
The stock I’m installing today is the Midwest Industries Enhanced M4-style stock adapter for the Beretta 1301 Tactical. It features a cheek riser, QD sling sockets, and compatibility with AR-style pistol grips. This allows for a highly customizable setup compared to fixed or proprietary stocks.
Safety check and setup
Before starting, I clear the shotgun and visually inspect the chamber to confirm it's safe. I also prep my workspace and lay out the tools: torque wrench, driver bits, Allen keys, threadlocker, and the new stock components.
Removing Mesa Tactical stock
The gun came to me with a Mesa Tactical stock, which is held in place by a castle nut and end plate. Using a castle nut wrench, I remove the rear portion of the stock and set it aside. I also remove the screw and mounting hardware from the grip and save the receiver extension parts in case I need them later.
Disassembling rear hardware
Once the stock is off, I take apart the internal adapter that connects the Mesa stock to the Beretta receiver. I use an Allen key to remove the central bolt, being careful not to strip the threading.
Cleaning receiver threads
Before installing the new Midwest adapter, I clean the rear receiver threads with a small pick and rag to remove any leftover threadlocker or debris. Clean threads ensure better torque application and prevent cross-threading.
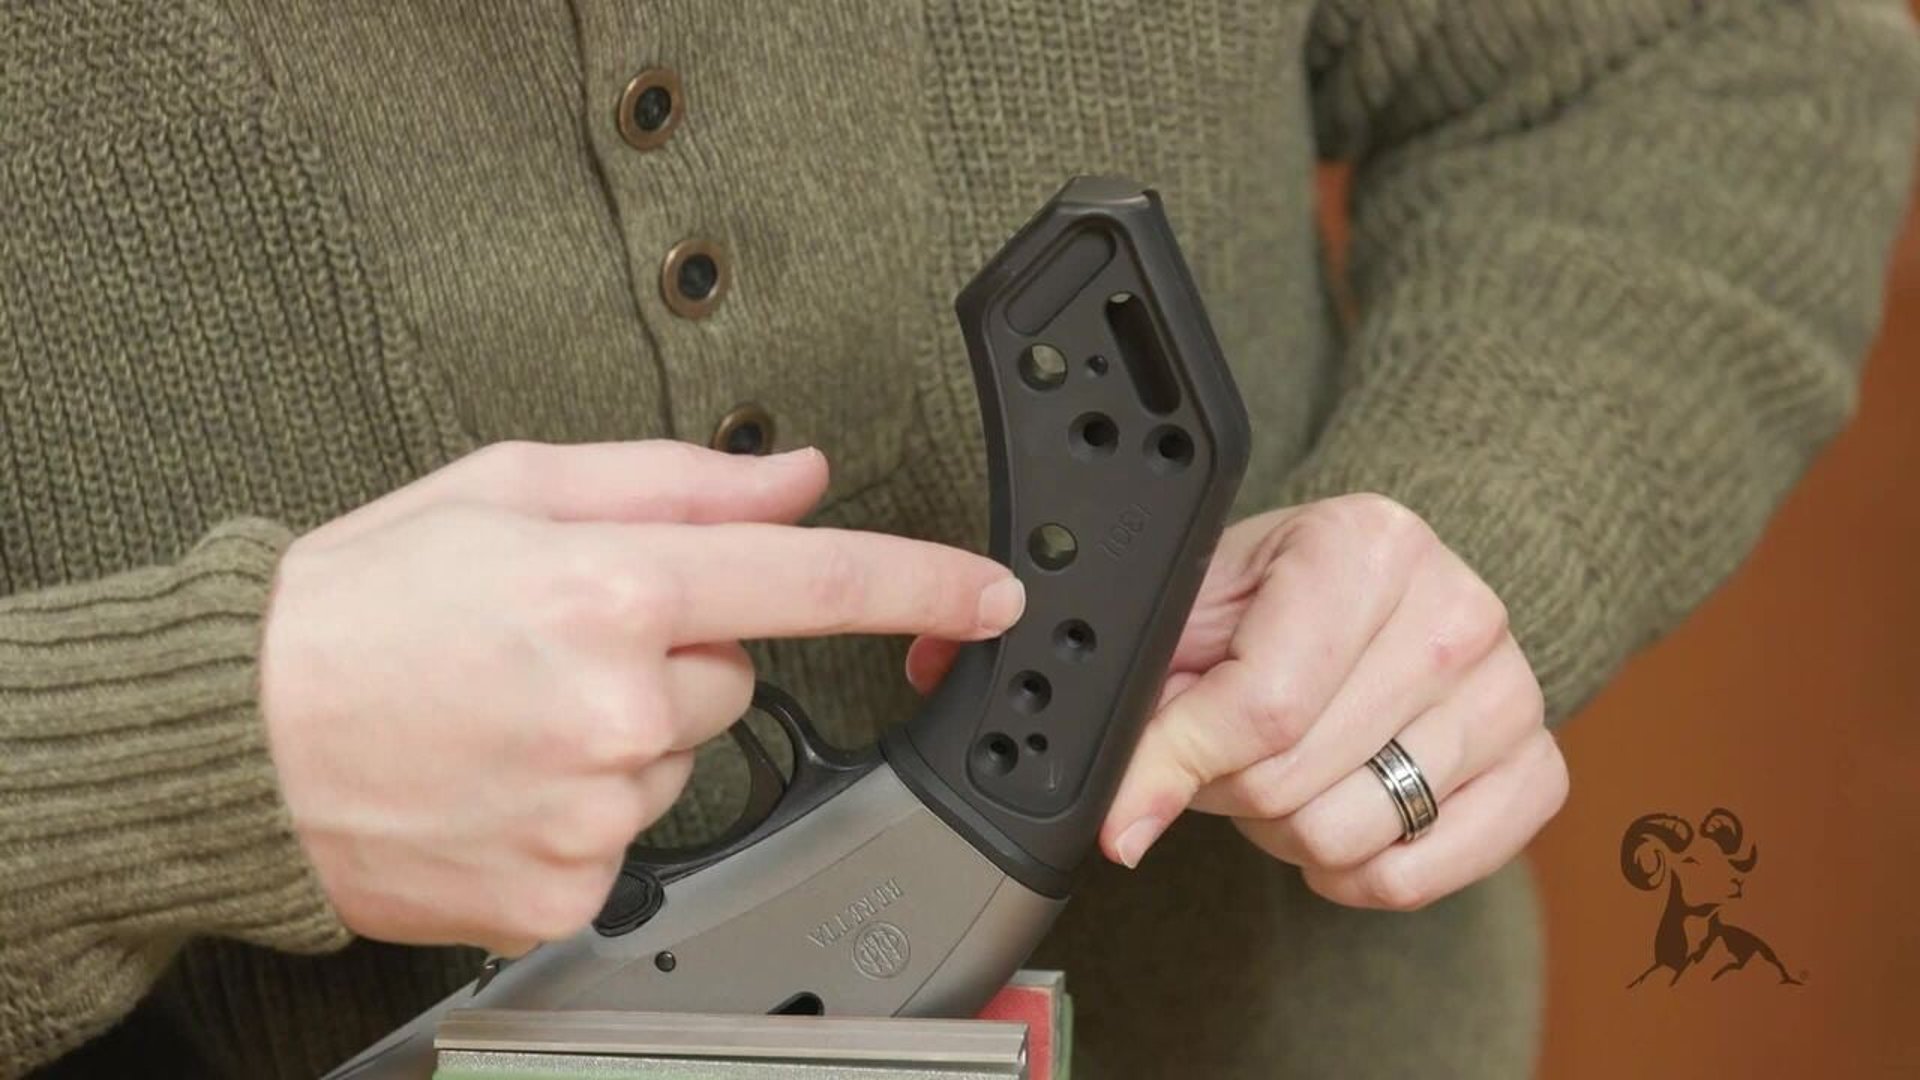
Installing Midwest Industries adapter
I thread the Midwest receiver adapter into the back of the shotgun. It includes an internal washer to help center it and snug it up. I tighten it firmly by hand, then use a tool to rotate it to its final position.
Threadlocker and torque specs
For key fasteners like the buffer tube lock plate, I apply a small amount of blue threadlocker. This prevents loosening under recoil while still allowing removal later. I reference the Midwest instructions for torque specs and use a torque wrench to dial everything in properly.
Attaching rear plate and lock nut
Next, I install the rear QD plate and castle nut. I make sure everything is aligned before tightening the castle nut against the back of the adapter, locking everything in place.
Installing the grip frame
The Midwest stock uses AR-style pistol grips, so I install a standard A2-style grip. The grip screw passes up through the grip and into the adapter, securing the lower half of the stock.
Torqueing grip screws
I torque the grip screw to the recommended setting, ensuring a tight fit without over-compressing the polymer. It’s important to check that the safety selector and trigger aren’t binding after grip installation.
Sliding on the stock body
With the adapter and grip secured, I slide the buttstock body onto the tube. It clicks into place just like a standard AR stock, giving me multiple length-of-pull settings.
Installing stock screws
Once the stock is in position, I install the side mounting screws that anchor it to the cheek riser assembly. This helps lock everything down and eliminate wiggle.
Adjusting and reversing cheek riser
The cheek riser is reversible, so you can configure it for left- or right-handed shooters. I show how to remove the riser, flip it, and reinstall it depending on your optic height and shooting preference.
Mounting M-LOK shell holder
One cool feature of this stock is the M-LOK slots on the side, perfect for accessories like a shell holder. I install a 5-round shell carrier, which gives me quick access to reloads and balances the gun well.
Installing G10 grip panels
Finally, I upgrade the grip with G10 grip panels. These offer better texture, are more durable than polymer, and give a premium feel to the shotgun. I swap them out with a couple screws and the install is complete.
Final Thoughts
This stock upgrade adds a ton of functionality and customization to the Beretta 1301. From QD points and cheek riser adjustability to M-LOK compatibility and AR-style grip options, it’s a solid enhancement for any tactical or defensive shotgun setup. If you're looking to modernize your 1301, the Midwest Industries Enhanced Stock Adapter is a fantastic option.
Beretta 1301 Tactical, 1301 stock upgrade, Midwest Industries stock, shotgun stock install, Brownells Tech Tip, Beretta 1301 setup, tactical shotgun build, M-LOK shell holder, G10 grip panels, modular shotgun furniture, shotgun accessories, shotgun DIY install, 1301 furniture swap, Beretta 1301 aftermarket parts, 1301 cheek riser install