How to Zero a Rifle
Caleb from Brownells heads out to Big Springs Shooting Complex to demonstrate his process for zeroing rifles, particularly when working with new builds. The method he shares focuses on establishing a solid 100-yard zero, which is a common and versatile choice for both hunting and precision shooting applications.
What You Will Learn
You’ll see an easy step-by-step process for getting your rifle sighted in, starting up close and then moving out to 100 yards.
Benefit
Following this method helps you use less ammo, avoid frustration, and end up with a rifle that’s accurately zeroed and ready to shoot.
Why Use a 100-Yard Zero
While there are different zeroing distances used for various purposes, Caleb explains that 100 yards is one of the most popular. It’s ideal for hunting and is frequently used in the precision rifle shooting (PRS) community. It offers a practical balance for most shooting situations.
Rifle Build and Setup Overview
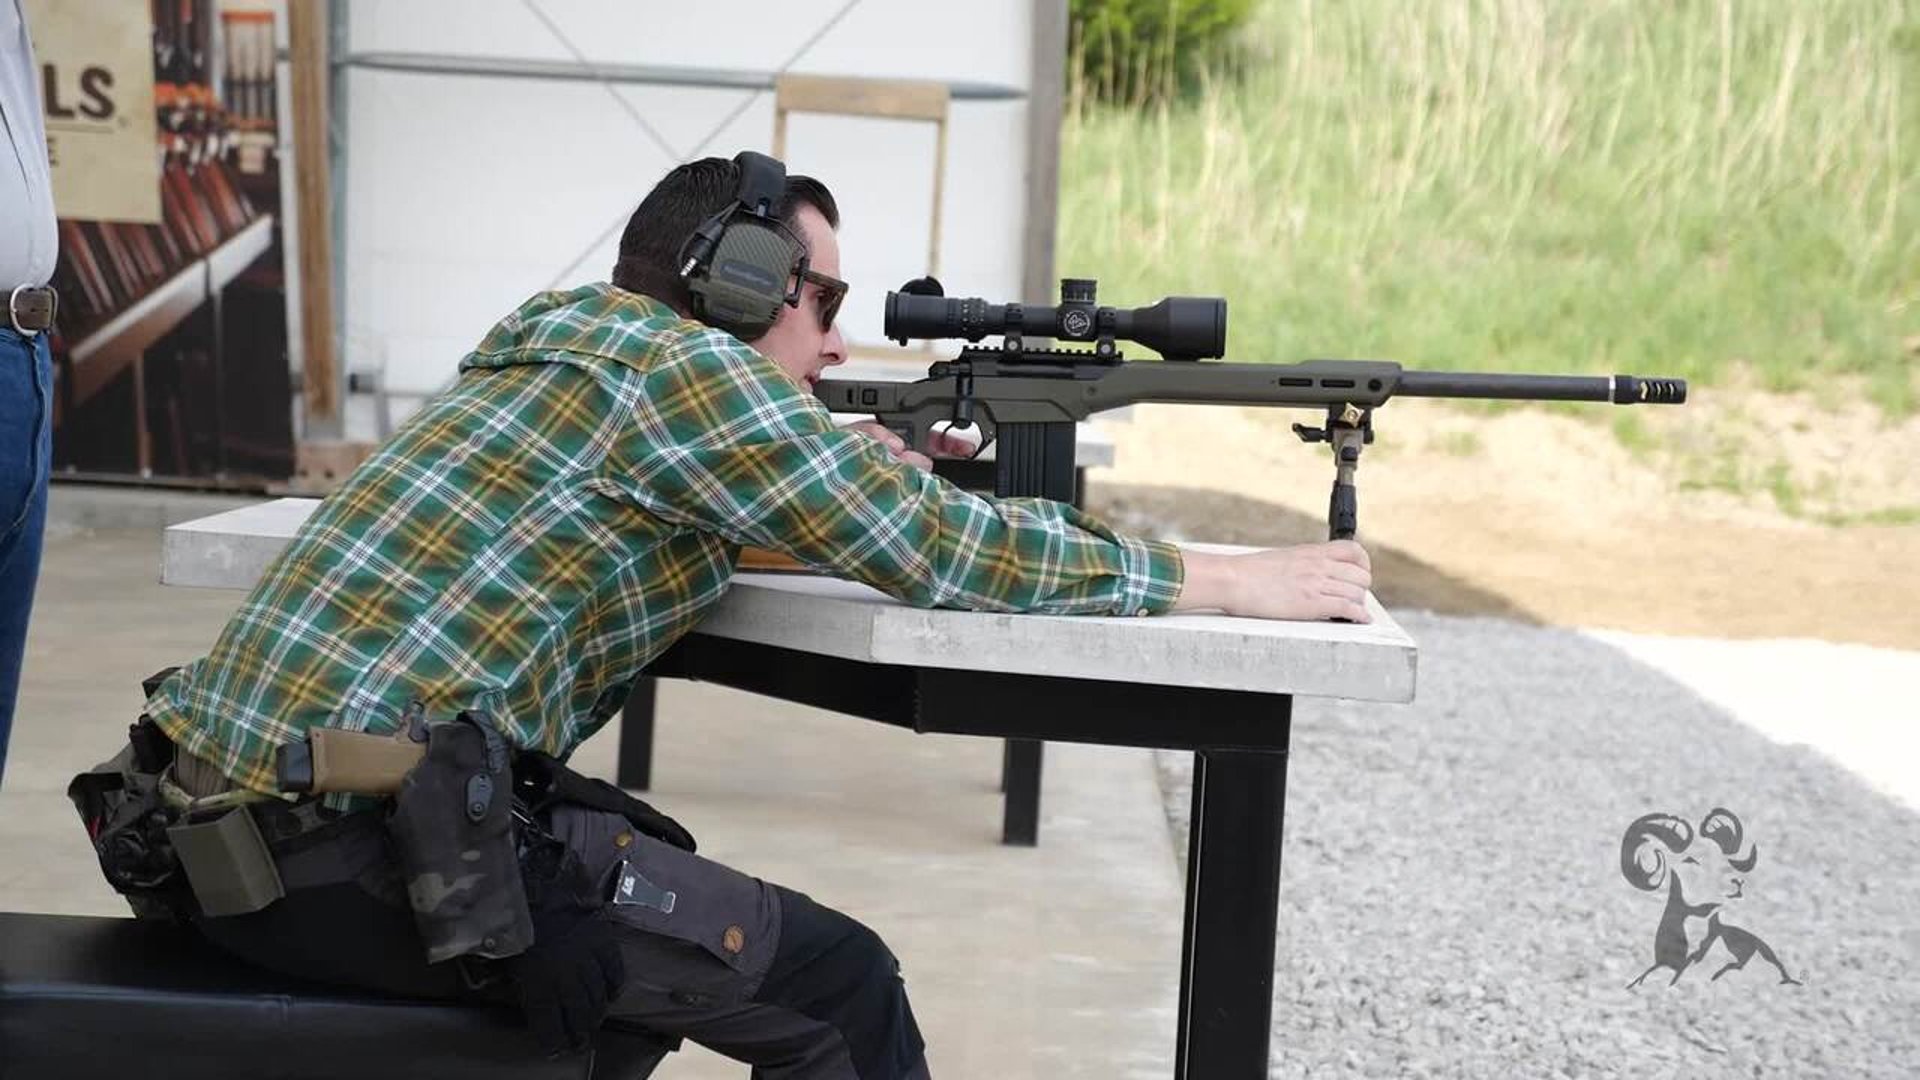
The rifle Caleb uses in this demonstration is a bolt-action build based on the Aero Precision Solus action and paired with the MDT Hunt 26 chassis. It's a fresh build that hasn't been zeroed yet, so the process shown is from start to finish.
Bore Sighting at 25 Yards
Before firing any rounds, Caleb begins with a bore sight. He removes the bolt and looks directly through the bore at a 25-yard target. Once the barrel is visually aligned with the target, he adjusts the scope to match what he sees through the bore. This simple method saves time and ammunition when done properly.
Establishing a Shot Group
Next, Caleb fires a three-shot group at the 25-yard target. This step is important because it verifies that the rifle is grouping correctly. If a rifle does not group well, there's no point in continuing with the zeroing process. Diagnosing accuracy issues should always come before scope adjustments.
Evaluating the 25-Yard Group
After shooting, Caleb checks the target. His group is slightly low at 25 yards, which is acceptable because it usually puts the shots near center at 100 yards. Since the group looks good and is consistent, he decides not to adjust yet and moves to the 100-yard target.
Moving to 100-Yard Target
With the 25-yard phase complete, Caleb shifts his focus to 100 yards. He ensures the rifle is set up properly, including adjusting parallax if the scope has that feature. He also brings in a spotter, Steve, to help watch impacts through binoculars.
First Shot at 100 Yards
Rather than firing a full group right away, Caleb takes a single shot to see where the rifle is hitting at 100 yards. This is an efficient way to begin dialing in the final zero if you already confirmed grouping at a closer range.
Adjusting Elevation and Windage
After seeing the impact point, Caleb makes adjustments using the scope's MRAD turrets. He starts with three clicks down and a couple clicks left. Rather than over-correct, he prefers to walk his shots in with small, controlled changes.
Managing Wind and Target Movement
Wind becomes a factor during this session, blowing both the shooter and the target. This affects consistency, making it difficult to read shots. Caleb addresses this challenge by bracing the target and continuing the process with realistic expectations. He explains that not every range session goes perfectly, and that's okay.
Target Stability and Realistic Expectations
Instead of pretending the conditions are ideal, Caleb shows what real-world zeroing often looks like. Target movement can ruin groups and waste ammo. He braces the target with wood, resets, and continues the process, emphasizing the importance of good target setup for meaningful results.
Finalizing the Zero
Once the target is stabilized, Caleb fires a shot that lands about half an inch right of center. He makes a small adjustment to bring it on target and confirms with follow-up shots. Now that the target is steady, his shots are stacking up with great consistency.
Consistency with Bullseye Hits
Caleb continues placing rounds into the bullseye. He’s happy with the grouping and mentions that for hunting purposes, this would be more than accurate enough. However, because he plans to stretch this rifle out to 500 yards, he fine-tunes the zero with one last click to the left.
Verifying and Locking in the Zero
He finalizes the 100-yard zero and reviews the target, showing the progression of his shots. From the first impact on the right to the final shots nearly touching in the center, the process demonstrates a clean and methodical approach. He confirms that the rifle is now ready for longer-range work.
Target Review and Final Thoughts
Reviewing the target, Caleb points out the grouping progression and reiterates that he’s pleased with the result. He’s not a professional PRS competitor, but he enjoys precision shooting and takes satisfaction in a good, functional zero. He adds that if he were using this as a hunting rifle, no further adjustments would be needed.
Summary of Zeroing Steps
Caleb wraps up by summarizing the key steps in his zeroing process:
- Bore sight down the barrel (optional but helpful)
- Shoot a group at 25 yards to ensure you're on paper and the rifle groups well
- Move to 100 yards and finalize the zero
He emphasizes that this is one method, not the only method, and encourages shooters to find what works best for them.
Viewer Tips and Closing Remarks
Caleb invites viewers to share their preferred zeroing methods in the comments. He also reminds viewers to like and subscribe to the channel and to reach out to the Brownells tech line if they need any help. The session closes with a reminder that practical experience and honest evaluation are key to building a reliable rifle setup.