Handgun Shooting Drills for New Shooters
Synopsis
The video is a concise, well-paced guide aimed at beginners. Hosts Caleb and Jude walk new handgun users through a set of foundational dry‑fire and live‑fire drills, emphasizing safety, control, and building muscle memory.
What You Will Learn
The video covers basic drills that focus on trigger control, such as dry-firing with a penny balanced on the front sight and using classic ball-and-dummy drills to identify and eliminate flinching. It also introduces structured live-fire routines that gradually incorporate drawing, follow-up shots, and exercises to test and refine smooth shooting technique under pressure.
Benefit
Watching this video will leave new shooters with a clear, practical toolkit—complete with hands‑on drills—to build precision, control, and confidence every time they head to the range.
Introduction
Caleb and Jude from Brownells introduce a simple yet effective handgun drill aimed at new shooters. The purpose is to reinforce the core shooting fundamentals in a practical way.
Purpose of the Drill
This drill is designed to help shooters focus on accuracy and control by sticking to the basics. It’s not about speed or advanced techniques, but about developing solid foundational skills.
Handgun Grip Basics
The first point of instruction is the grip. Caleb emphasizes that a high grip on the firearm reduces muzzle flip and improves control. Jude demonstrates the correct hand positioning, ensuring both thumbs are forward and not crossing. The support hand wraps fully around the shooting hand, applying firm but controlled pressure.
The ideal grip involves squeezing as tightly as you can, then relaxing just slightly. The team acknowledges there are many grip philosophies out there, but what they're teaching is what works best for them.
Sight Focus Tips
A key principle of shooting is maintaining your focus on the front sight. The rear sight and target should be slightly blurred in the background. This helps with better sight alignment and more accurate shots.
Trigger Pull Fundamentals
Jude explains the importance of trigger control. The pad of the index finger should rest on the trigger, and the pull should go straight back without angling. Shooters should avoid going past the first pad into the second joint, and instead focus on a smooth, surprise break.
Anticipating the recoil often leads to pushing the muzzle down, which causes low hits on the target. Maintaining a relaxed but confident trigger pull helps mitigate this.
Drill Setup
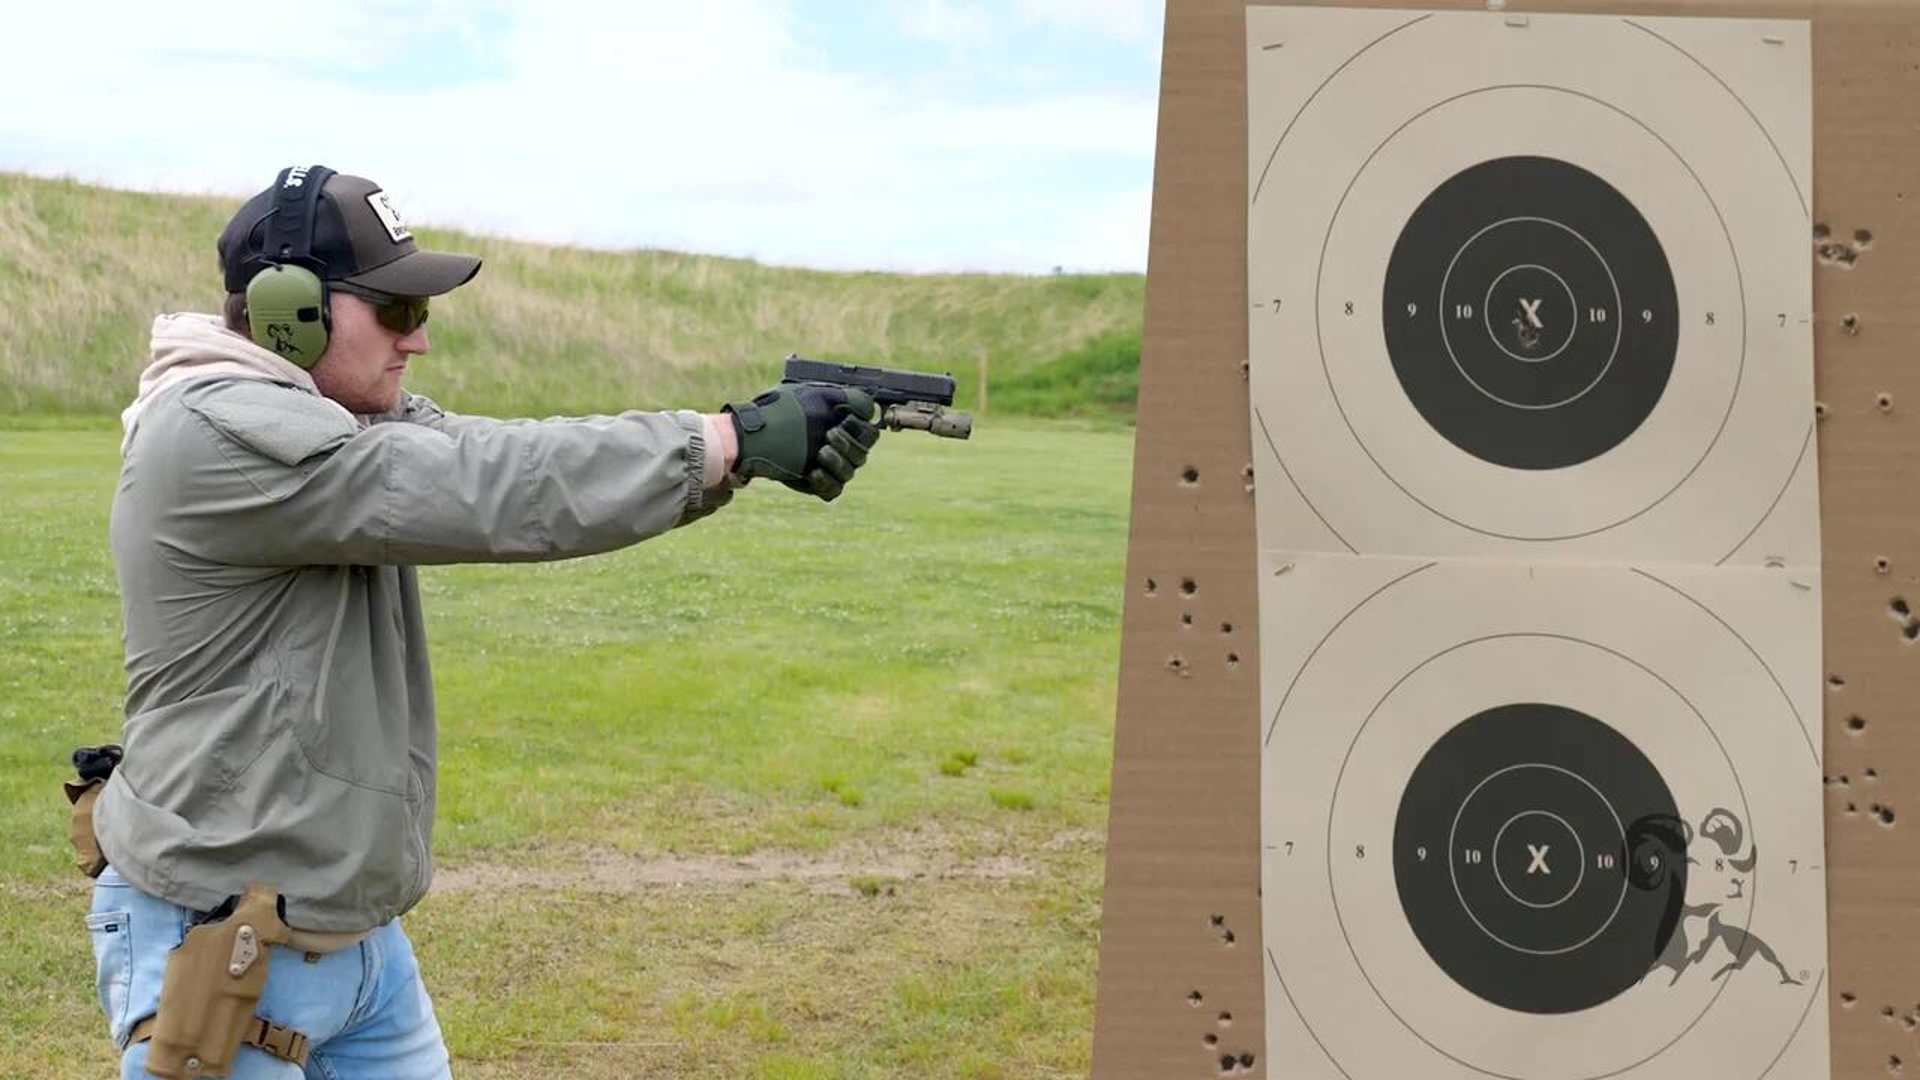
The team uses a paper target with dots for point-of-aim references. They recommend starting close, around five yards, to evaluate accuracy and consistency. Caleb notes that randomly shooting at junk in the backyard is unproductive and develops bad habits.
First 5-Yard Shot Group
Jude steps up and slowly fires a five-round group from five yards, carefully applying everything discussed. His group is tight, and Caleb points out how this indicates good grip, trigger control, and sight alignment. Any low hits or stringing to the sides would have indicated flinching or pulling issues.
7-Yard Shot Group
The drill continues at a longer distance. As expected, the group opens up slightly due to increased difficulty, but remains consistent. Caleb uses this opportunity to explain that when your groups are tight, it’s often a sign you’re ready to increase speed.
When to Increase Speed
Competition and defensive shooting instructors often advise shooters to keep their shots within the size of a fist. If you’re able to consistently shoot within that range, it’s time to begin increasing your speed while maintaining accuracy.
Fast Shooting Demonstration
Jude puts this into action by shooting faster. Despite firing more than five rounds, his group remains tight. This demonstrates that he is maintaining sight focus and grip control even at a faster pace. Caleb reminds viewers not to outpace their sights. Only shoot when the front sight is properly back on target.
Managing Recoil and Grip Adjustments
Jude and Caleb discuss how proper grip helps manage recoil and speeds up follow-up shots. Caleb shares that if you're constantly readjusting your grip after a few rounds, you're probably not holding the gun tightly enough or your hand positioning is off.
Grip Size Considerations
Sometimes the issue isn’t technique but the size of the grip itself. If your grip is too large, it may cause fatigue or poor control. Jude mentions he had to switch to a smaller grip module for better fit. If your firearm doesn’t have a modular grip, it may be time to look into another option that suits your hand size better.
Final Thoughts and Contact Info
The drill is simple, yet powerful. Caleb and Jude encourage shooters to focus on fundamentals and build from there. They invite viewers to leave comments or reach out via the Brownells tech line for help with gear or training.