Gunsmith Files and How To Use Them
INTRODUCTION TO GUNSMITH FILES
In this Brownells Tech Tip, Caleb gives a practical overview of gunsmith files and explains what new users need to know before they start buying and using them. The goal is not just to name a few tools. It is to help viewers understand how files are categorized, what shapes and cuts actually do, and how to choose the right file for the kind of work they plan to do.
For anyone getting into gunsmithing, this is important. Files are one of the most basic hand tools on the bench, but they take real technique to use well. The wrong file can remove too much material too fast. The right file can help you fit, shape, clean up, and refine metal with a high degree of control.
BASIC HAND FILES AND COMMON SHAPES
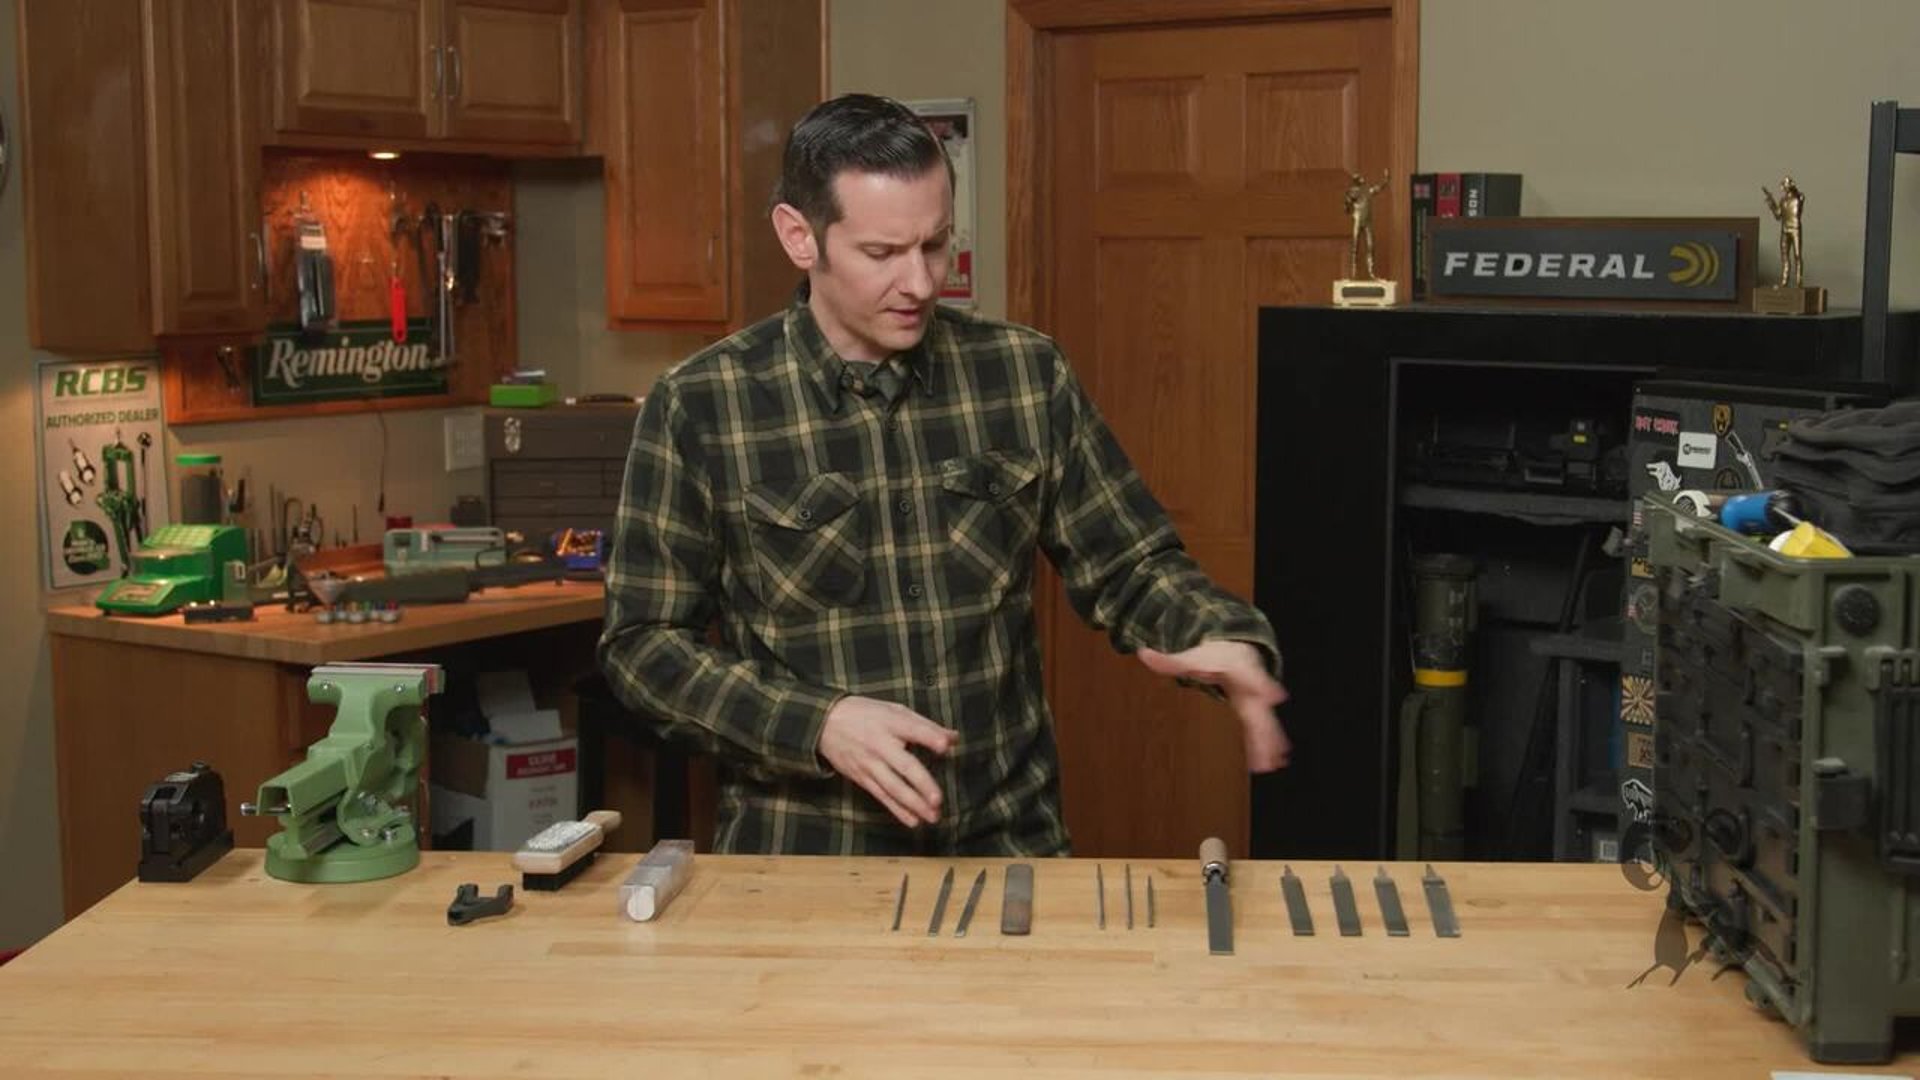
Caleb starts by pointing out some of the larger, more common hand files that most people recognize first. These include round files, square files, triangular files, half-round files, and tapered files. Each shape has a purpose.
Round files are useful for opening up holes or cutting rounded grooves. Square files work well when you need to open up square slots or maintain defined corners. Half-round files are versatile because they give you a flat side for flat surfaces and a curved side for contoured work. Triangular files are helpful for certain angle-specific jobs, and tapered files offer good control in tighter or more specialized work.
Understanding file shape is one of the first steps in choosing the right tool. The profile of the file should match the kind of surface or cut you are trying to create.
WHY FILE QUALITY MATTERS
One of Caleb’s first warnings is about cheap files. Lower-quality files wear out fast, especially when used regularly for gunsmithing or metalworking. They also tend to clog more easily, and when metal starts sticking in the teeth, the file can scratch and gouge the work surface instead of cutting it cleanly.
That is one of the big reasons serious bench work calls for quality files. A good file lasts longer, cuts more consistently, and gives you better control over the finished surface. If you use files often, buying better files saves money faster than most people expect.
AMERICAN PATTERN FILES EXPLAINED
Caleb next moves into American pattern files, which are common and easy to identify once you understand the terminology. These files are usually described by both cut style and coarseness.
The three main American pattern grades he covers are smooth, second cut, and bastard cut. Smooth is the finest of the three and leaves the cleanest surface. Second cut is a step more aggressive and removes material faster. Bastard cut is coarser still and is meant for faster stock removal.
This scale matters because filing is often a staged process. If you need to remove a lot of metal, you may start with a coarser file. Once the shape is close, you move to a finer file to refine the surface and reduce tool marks.
SINGLE CUT VS DOUBLE CUT FILES
Another important distinction is single cut versus double cut. Caleb explains that double cut files have teeth cut in two opposing directions, creating a more aggressive cutting pattern with pointed teeth. These remove material faster, but they also leave a rougher finish.
Single cut files are less aggressive and often leave a cleaner surface. They are a better choice when you want more control or a smoother result. This is one of the most important things to understand when selecting a file. Tooth pattern directly affects both cutting speed and surface finish.
SWISS PATTERN FILES AND FINER WORK
From there, Caleb gets into Swiss pattern files. These are generally finer than American pattern files and are better suited for more controlled, detail-oriented work. Swiss pattern files are graded differently, starting at 00 for the coarsest and going finer as the number increases.
In gunsmithing, Caleb notes that most people will not need the full range available. You usually see a practical spread from 00 up to around 3 or 4, with the very finest grades being more common in other trades like jewelry work.
This matters because Swiss pattern files are often the better choice for precision work on firearm parts. If you need a cleaner finish, tighter control, or less aggressive material removal, Swiss files are usually where you want to be.
THE FILES CALEB USES MOST
Caleb points out that two of his most-used files are a Swiss pattern 0 and a Swiss pattern 2 in a small tapered profile. The 0 gives him a little more bite when he needs to move material, and the 2 helps clean up the cut marks left behind.
That pairing makes a lot of sense on a gunsmithing bench. Start with the coarser of the two for shaping or fitting, then move to the finer file to clean things up. If an even smoother result is needed, the next step is often a stone rather than an even finer file.
This kind of tool progression is common in gunsmithing. You remove material in controlled stages instead of trying to do everything with one tool.
SPECIALTY FILES AND SAFETY EDGES
Some of the files Caleb shows have special features that matter for gun work. One square Swiss pattern file has safety edges, which means some sides have no teeth. That lets you file one surface without cutting the adjacent surface, which is extremely useful when working in corners, slots, or around surfaces you want to protect.
He also highlights a 60-degree triangular Swiss pattern file, which is especially useful for cleaning up dovetails on handgun slides. That is a great example of how a specific file shape and angle can make a common gunsmithing task much more precise.
HALF-ROUND FILES AND RASPS
Caleb also covers a half-round file with a rasp side, which he uses mostly for woodworking. Rasps are very aggressive and are excellent for shaping wood quickly, but they are generally not what you want on steel firearm parts. The flat and rounded surfaces of a half-round file, on the other hand, make it one of the more versatile tools in the drawer.
This is another reminder that some tools on a gunsmith bench may cross over into stock work or general shaping tasks, not just steel fitting.
FILE HANDLES AND BENCH ACCESSORIES
Although Caleb admits he is not always as disciplined as he should be about using file handles, he does show an adjustable handle that can clamp onto different files. File handles improve comfort and control, especially when you are spending more time on a job.
He also covers the basic support tools that make files work better. The first is the file card, which is used to clean chips and debris out of the teeth. If you let a file clog up, trapped material can scratch the work and create uneven cutting.
He also explains file chalk, which is rubbed into the teeth before use to help keep material from packing into the file. It does not replace cleaning with a file card, but it helps extend the time between cleanings and keeps the file cutting more consistently.
CHOOSING THE RIGHT FILE FOR THE JOB
One of the most practical parts of the video is Caleb’s advice on file choice. If you need to remove a lot of material quickly, use a coarser file. If you are refining a screw head, doing a more delicate cut, or trying to leave a cleaner finish, step down to a finer file.
That sounds simple, but it is exactly the kind of judgment that takes time to build. Filing is not just about removing metal. It is about removing the right amount of metal, in the right place, with the right finish left behind.
PROPER VISE SETUP FOR FILING
Before demonstrating technique, Caleb explains that vise height matters. Ideally, the top of the vise should be roughly level with your elbow when your arm is bent. That puts your arm and the workpiece in a more natural alignment and makes it easier to keep the file flat.
If the vise is too low, you tend to file in a way that creates a high spot at the back of the workpiece. If the vise is too high, you tend to climb upward and leave a high spot at the front. Good filing starts with good setup, and vise height is a major part of that.
STANDARD FILING TECHNIQUE
Caleb demonstrates basic filing using a workpiece clamped in the vise. The key is to push the file forward across the workpiece while moving it laterally from one side to the other. That helps spread the cut across the full surface rather than concentrating in one narrow track.
He also notes that while files can cut slightly on the backstroke, they cut much better going forward. Lifting slightly and resetting on the return stroke also helps extend file life and encourages a more controlled rhythm.
This is one of the biggest takeaways from the video. Filing well is not just about the tool. It is about body position, pressure, rhythm, and consistency.
DRAW FILING AND LATHE FILING
In addition to standard filing, Caleb explains draw filing. In draw filing, the file is held across the workpiece and moved lengthwise. This is especially useful for smoothing flat surfaces, removing pitting, or refining barrels and receivers. It is a common technique for getting a cleaner, flatter finish.
He also briefly covers lathe filing, which is exactly what it sounds like: filing a workpiece while it rotates in a lathe. The key rule here is to keep the file moving and never stop on the spinning workpiece. For viewers without a lathe, this is more background knowledge than a day-one skill, but it is still useful to understand.
FINAL THOUGHTS ON GUNSMITH FILES
This video is a strong introduction to one of the most important hand tools in gunsmithing. Caleb covers the main file types, explains the difference between American and Swiss patterns, shows what cut styles do, and offers practical advice on technique, maintenance, and setup.
The main lesson is that files are simple tools, but they reward skill and patience. A good file cuts better, lasts longer, and helps produce cleaner work. A good technique keeps surfaces flatter and results more consistent. For anyone learning hand fitting, surface cleanup, or bench metalwork, understanding files is a major step in the right direction.