From The Bench: Tactical Levergun with Marlon Crooks
Synopsis
In this video, Caleb and his former Army platoon sergeant, Sgt. Crooks, upgrade a classic Henry .45-70 lever-action rifle into a modern tactical setup. They cover each step—from disassembly to installing a new handguard, optic, and accessories—while sharing gunsmithing tips and wrapping up with a live range test.
What You Will Learn
Viewers will learn how to disassemble and upgrade a Henry .45-70 lever-action rifle with modern tactical components, install and align optics and accessories, and properly zero the rifle for accurate shooting—all while picking up practical gunsmithing tips and techniques.
Benefit
The benefit to watching is gaining hands-on knowledge and step-by-step guidance for turning a traditional lever-action rifle into a fully customized tactical setup, making it both more versatile and optimized for modern use.
Introduction
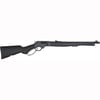
Caleb introduces the build and shares a bit of history with Sgt. Crooks, his former Army platoon sergeant. The goal is to take a traditional Henry .45-70 lever-action rifle and kit it out with modern tactical components. Sgt. Crooks notes the gun's versatility, capable of both nostalgic plinking and big-game hunting.
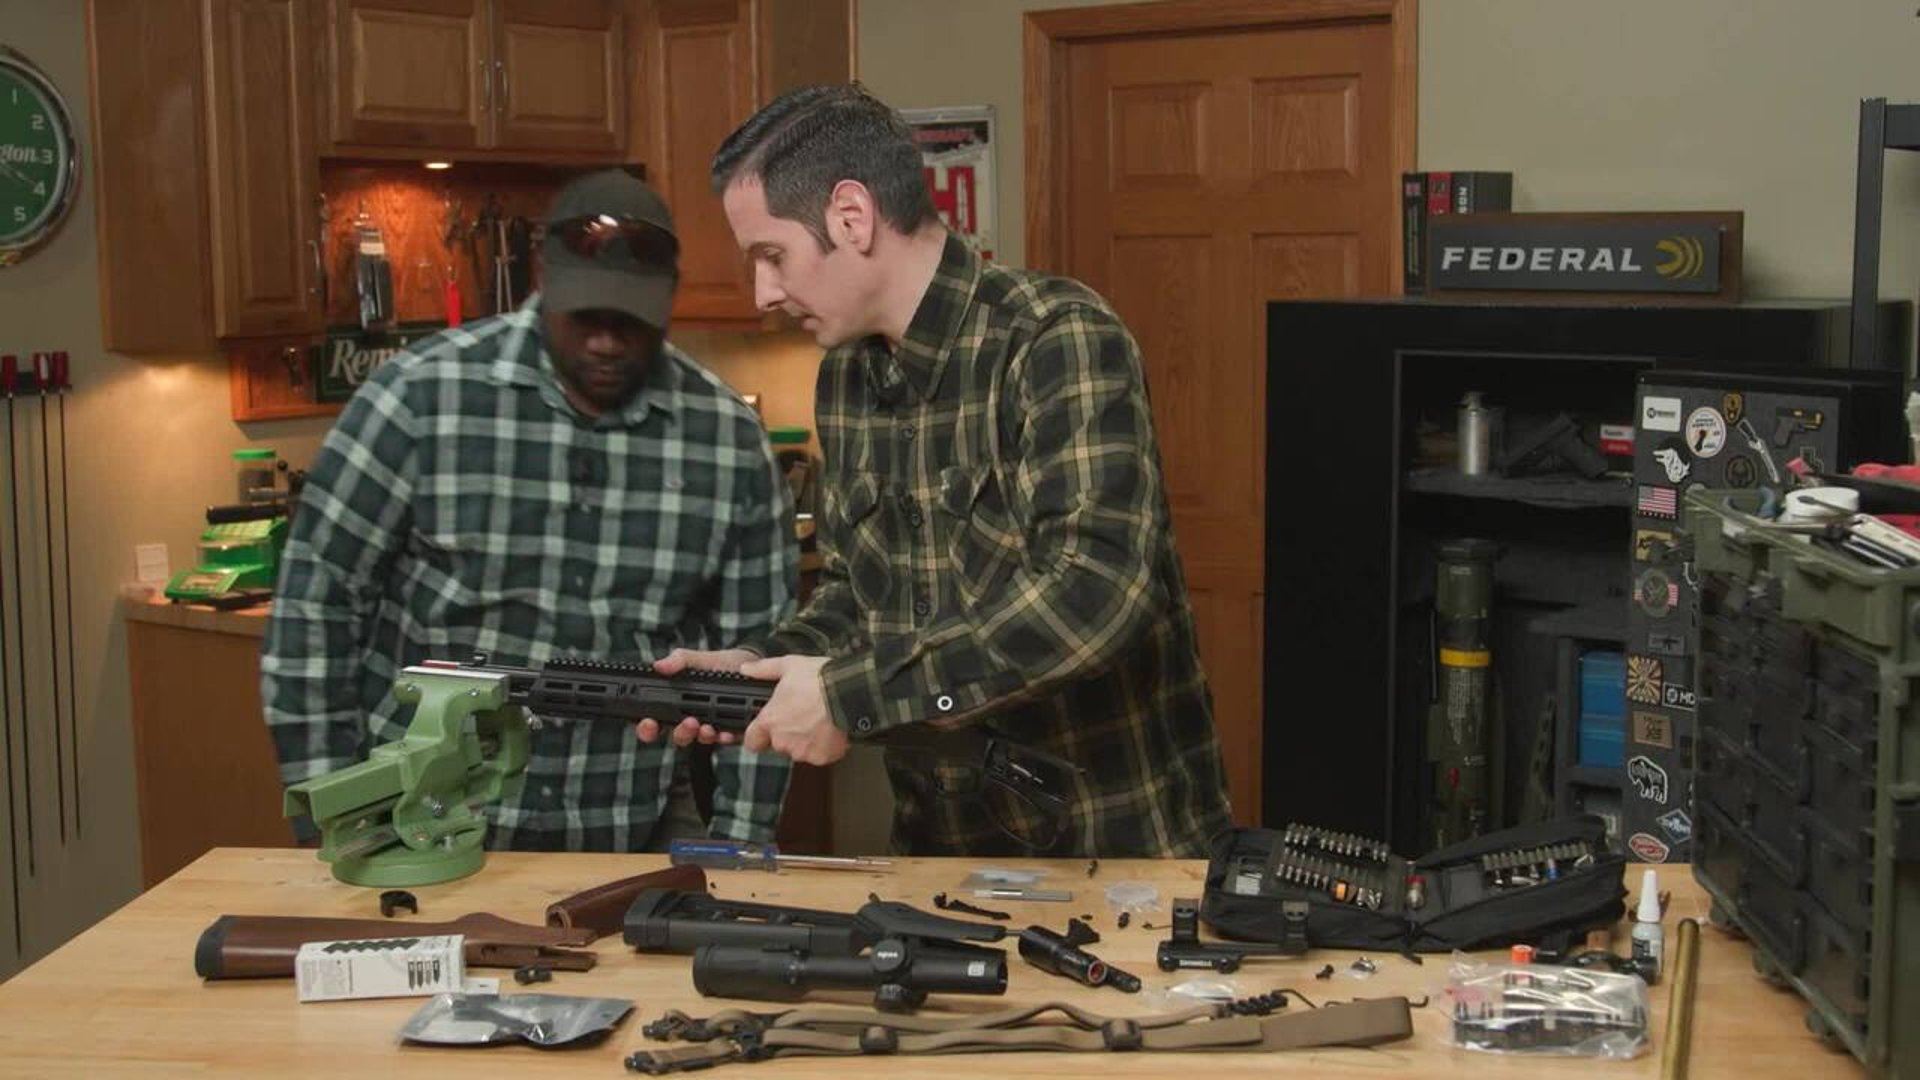
Disassembling the Henry .45-70
The build begins by carefully removing the stock and handguard. Using a vice and padded jaws, Caleb walks through how to remove the rear stock bolt and separate the stock. They continue by removing the magazine tube and unscrewing the factory handguard cap.
Removing Stock and Handguard
Once the handguard retaining screws are out, Caleb and Crooks pull the magazine tube from its dovetail. They use a nylon punch to tap the components free without damaging the finish. The dovetail cap and internal tube are all set aside in preparation for new furniture.
Removing Factory Sights and Prepping Receiver
They remove the factory iron sights to make room for the new Midwest Industries top rail and handguard. Caleb explains how to punch out the front sight and lift the rear sight using basic gunsmithing tools. Plug screws from the receiver are removed to accept new hardware.
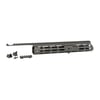
Installing Midwest Industries Handguard
With everything stripped down, Caleb fits the new Midwest Industries handguard. A small amount of filing is needed to get a proper fit. He explains how to index the new parts to the receiver and barrel, and how to use Loctite and Vibra-Tite to prevent screws from backing out.
Adjusting Fitment and Mounting Components
Caleb shows how to install brass stabilizer screws that gently contact the barrel to keep the handguard solid and aligned. He explains how to visually center the handguard and how to prevent unwanted flexing by properly tensioning screws in a star pattern.
Installing Top Rail and Rear Sight
With the handguard installed, they move on to mounting the top rail and reinstalling a rear sight. Caleb discusses screw length selection and aligning the tick marks on the sight for proper windage. Thread locker is applied to secure everything for long-term use.
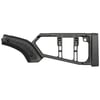
Reinstalling Stock and Fitting Accessories
Once the upper components are installed, they reinstall the stock and begin accessorizing. An EOTech Vudu 1-6x optic is selected for the build, along with a Cloud Defensive light and M-LOK hand stop. Caleb provides tips for proper sling placement and M-LOK installation.
Setting Up Sling and Light Configuration
The duo configures a two-point sling, mounting the front and rear QD points in standard AR-style locations for fast transitions. A Cloud Defensive light is installed with cable routing for a clean, snag-free profile. Caleb shares some humorous but helpful cable management advice.
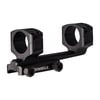
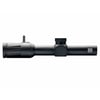
Mounting EOTech Vudu 1-6x Optic
They begin mounting the optic, testing eye relief and checking clearance with the rear sight. The optic is temporarily installed using a Brownells mount, and ring screws are torqued just enough to allow for adjustments. Caleb prepares for final leveling before permanent mounting.
Replacing Mount for Better Cheek Weld
To improve cheek weld and eye relief, they switch to a lower Trijicon mount. Caleb explains the benefit of the mount’s clamping system and how it maintains zero even if screws loosen. The lower mount allows the optic to sit further back and more comfortably on the rifle.
Scope Leveling and Final Torque
Using a specialized leveling tool and a machinist’s file, Caleb aligns the optic level to the rifle. He walks through how to visually match bubble levels and torques the ring screws evenly. The method ensures the optic is level, secure, and ready for recoil from heavy .45-70 rounds.
Adding M-LOK Rail Covers
To protect hands and improve grip, M-LOK rail covers are added along the handguard. Caleb explains that even if your primary grip is forward, it helps to add texture in multiple spots for different shooting positions. Sgt. Crooks adds the covers where they suit his shooting style.
Range Test and Zero Confirmation
At the Big Spring Shooting Complex, they start with a 25-yard zero using Hornady LeverEvolution 325-grain FTX ammunition. After confirming a tight shot group, they make final adjustments and stretch out to 100 yards. The rifle performs well, hitting center steel reliably.
Wrap-Up and Contact Info
With the build complete and tested, Caleb congratulates Sgt. Crooks on his new tactical lever gun. He invites viewers to leave questions or comments and reminds them that Brownells’ Tech Line is available for support. The video closes with a thank you to the audience and a nod to future projects.