The SCT Manufacturing SCT-19 Compact Pistol Frame is a very popular starting point for folks who want to build up their own custom pistol using Glock® parts. The SCT-19 comes stripped, except for the slide rails and locking block. The good news is it accepts a G19 Gen3 slide assembly and internal parts. Brownells Gun Tech™ Caleb Savant shows us how to install all the parts needed to turn a bare St. Croix frame into a complete lower half for your pistol. He's using a handy kit of Glock® factory parts from Brownells. NOTE: St. Croix's frame is a serial-numbered FFL item.
The SCT frame comes with the locking block installed. You will need to remove it so you can install some of the other parts.
SLIDE LOCK (2:47): This is the pair of levers on each side of the frame that you pull down to release the slide so you can take it off the frame. The part of the slide lock spring that has a 90-degree angle in it is inserted facing the front of the frame, with bit that sweeps up like Caleb's hair pointing toward the rear. The notch on the top of the lever itself should face the rear of the frame.
MAGAZINE CATCH (6:13): If you're using a factory frame, the magazine catch spring will be installed already. You'll have to install it on the SCT Manufacturing frame. There's a big opening for the mag catch on the right-hand side of the frame and a small opening on the left. So you know the small end has to go through the large hole opening first, with the cutout for the mag catch spring pointing down. Caleb shows us the trick for finagling the spring out of the way so you can fully seat the catch.
ASSEMBLE THE TRIGGER (10:34): The trigger spring, trigger, trigger bar, and disconnector all meet up in the trigger housing.
INSTALL THE TRIGGER ASSEMBLY (13:06): The trigger housing snugs into the pocket behind the magazine well. Now you can reinstall the locking block. Insert the small plastic pin through the hole at the back of the frame. This keeps the trigger housing from popping out of the frame when you take the slide off. Farther up, there are two holes on each side of the frame. The pin that looks like a barbell goes through top hole.
SLIDE RELEASE (17:10): Goes between the frame and the trigger body, under the locking block. Insert the last, largest, pin into the frame from the opposite side to anchor the slide release. Make sure the slide release snaps into the notch in the pin.
Congratulations, you have a complete pistol frame ready for a Glock® G19 sized slide assembly. That's a topic for a future video!
{"name":"DISASSEMBLY TOOL FOR GLOCK®","id":"10000740","price":9.99,"brand":"BROWNELLS","category":"Tools & Cleaning/Gun Tools/Handgun Tools","variant":"","quantity":0.0,"upc":null,"dimension32":"Universal Handguns","dimension33":"080001365","dimension34":"Disassembly Tool for Glock","dimension35":"TLCL","dimension36":"","dimension37":"No","dimension38":"Gun Tool Restriction: Yes","dimension39":"In stock","dimension40":"Yes","dimension41":3.9,"dimension42":9,"dimension43":3,"dimension44":"GNTL","dimension45":"No","dimension46":"","dimension47":null,"coupon":null}
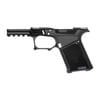
{"name":"LOWER PARTS KIT FOR GLOCK®17/19","id":"10014768","price":36.52,"brand":"BROWNELLS","category":"Gun Parts/Handgun Parts/Handgun Frames & Parts","variant":"","quantity":0.0,"upc":null,"dimension32":"19","dimension33":"430102317","dimension34":"BRN Lower Parts Kit For Glock 17/19","dimension35":"GNPT","dimension36":"","dimension37":"No","dimension38":"Gun Part Restrictions: Yes, Prop 65 restriction: This product contains chemicals known to the State of California to cause cancer and birth defects or other reproductive harm. For more information, go to www.p65warnings.ca.gov","dimension39":"In stock","dimension40":"No","dimension41":3.9,"dimension42":29,"dimension43":1,"dimension44":"GPRT","dimension45":"No","dimension46":"","dimension47":null,"coupon":null}