Maintenance Series: Springfield Prodigy 2011
Introduction
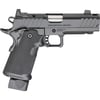
Caleb from Brownells walks through a complete cleaning and maintenance procedure for the Springfield Prodigy. This guide is also applicable to most 2011-style handguns. The pistol used in this example has seen heavy use, making it a great candidate for an in-depth cleaning tutorial.
Safety Check
Before starting any firearm maintenance, Caleb performs a full safety check. He ensures the magazine is removed and the chamber is visually inspected to confirm the handgun is unloaded. Safety checks are essential before disassembly begins.
Disassembly Begins
The disassembly starts by removing the slide from the frame. Caleb explains key identifiers on the slide and frame that help guide the breakdown process. This includes understanding the role of the slide catch and the alignment notch on the slide.
Slide Disassembly
Once the slide is separated from the frame, Caleb breaks down the slide components. This includes removing the guide rod, recoil spring, reverse plug, barrel, firing pin, and extractor. Each part is removed with care to prevent damage and to prepare for cleaning.
Extractor Removal
The extractor is one of the most overlooked components during cleaning. Caleb shows how to safely remove the internal extractor using a punch tool. Special attention is given to cleaning carbon buildup around the extractor claw.
Cleaning Setup and Solvent Application
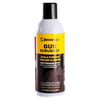
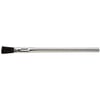
With disassembly complete, the cleaning process begins. Caleb uses Hoppes No. 9 solvent and Brownells acid brushes to break down carbon and grime. He also shares tips for effective solvent use and minimizing mess during cleaning.
Guide Rod and Spring Cleaning
The two-piece guide rod and recoil spring are cleaned thoroughly. Caleb explains how to inspect and maintain the spring’s integrity. He also demonstrates how to clean inside the spring using long cotton swabs.
Barrel Deep Clean
The barrel gets a detailed cleaning using a dewey rod and brushes. Caleb addresses cleaning both the interior rifling and the exterior port areas. While some carbon buildup is normal, excessive buildup should be removed with brushes and picks.
Extractor and Firing Pin Cleaning
The extractor channel and firing pin channel are degreased and scrubbed. These areas are critical for reliable ignition and extraction. Caleb shares how to properly reassemble the firing pin spring, avoiding common mistakes.
Slide Degreasing and Final Cleanup
Using a Brownells gun scrubber, the slide is completely degreased. Caleb explains the importance of reapplying oil after degreasing, especially on areas with raw metal or worn cerakote. Channels and tight crevices are cleaned using cotton swabs and compressed air.
Frame Cleaning
The frame is cleaned with acid brushes and rags. Caleb avoids spraying degreaser directly into the trigger mechanism and instead uses controlled brushing. Special attention is paid to the feed ramp area, magwell, and slide rails.
Reassembly Process
With everything clean, Caleb reassembles the handgun step by step. Each part is lubricated according to its friction level. Rim oil is used for light surfaces, while a heavier lubricant like Sons of Liberty Spec 76 is applied to high-wear parts like slide rails and locking lugs.
Magazine Cleaning
Magazine cleaning is saved for last. The baseplate is removed using a punch, and the internal spring and follower are wiped down. Caleb uses a dry cloth and a specialized dry lubricant (Mag Slick) to prevent buildup. Proper orientation of the follower is crucial during reassembly.
Final Thoughts and Outro
Caleb wraps up the video by reminding viewers that maintenance like this improves reliability and longevity. He encourages checking each component carefully and using the right products for the job. Viewers are invited to leave questions and share their favorite cleaning products in the comments.